The Best Laid (Boat) Plans . . .

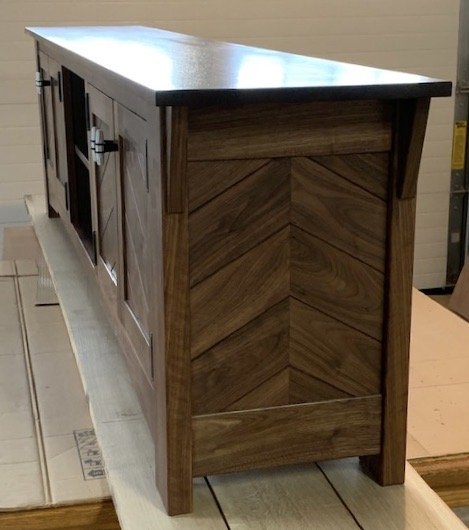
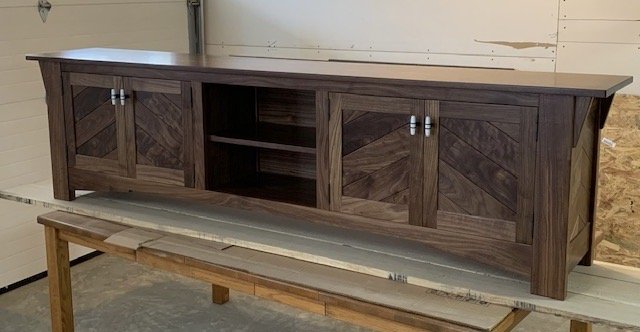
The new speed boat is coming together sweetly:

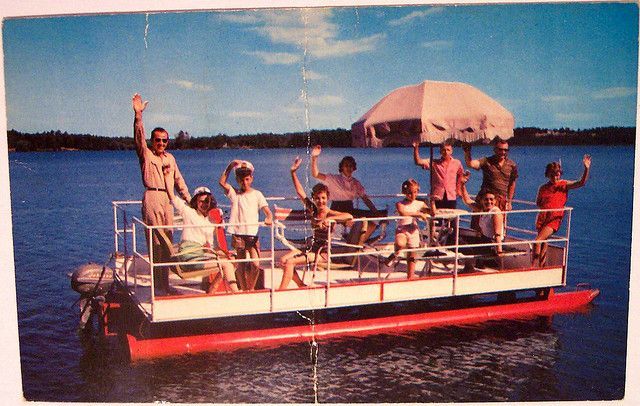
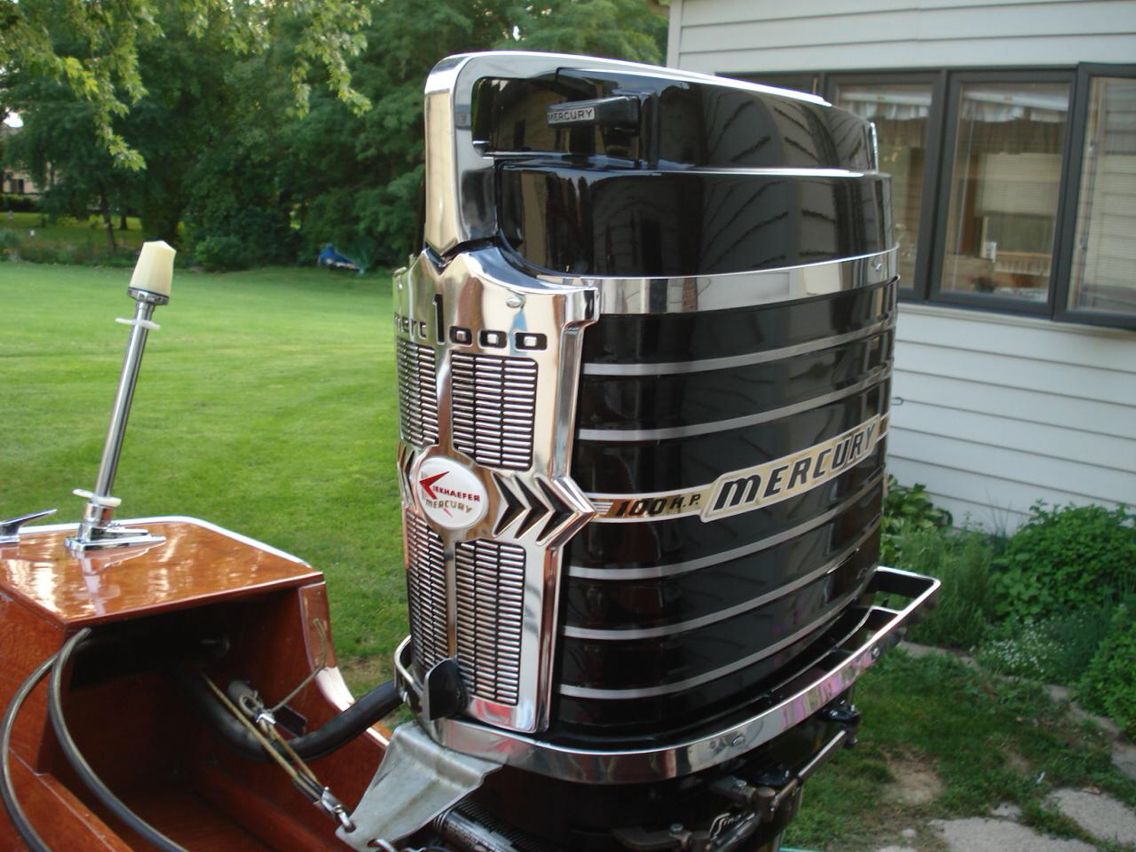
It will be 20′ long by 7’6″ weighing about 2100 pounds, and capable of carrying 8-10 people. This will be powered by an outboard motor of 150-200 Horse Power to push the boat to perhaps 45 MPH. At 450 pounds, the outboard delivers a much better power to weight ratio, and sitting right there on the transom, makes for easier maintenance. An old Mercury 200 Tower of Power like the one below would be the perfect attitude, but then, there goes the ease of maintenance.

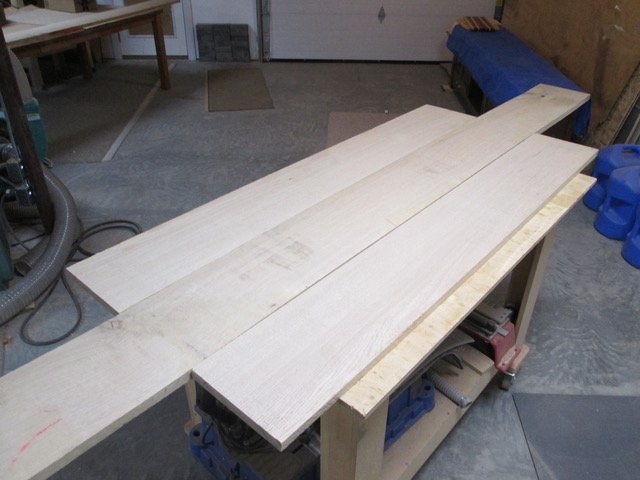
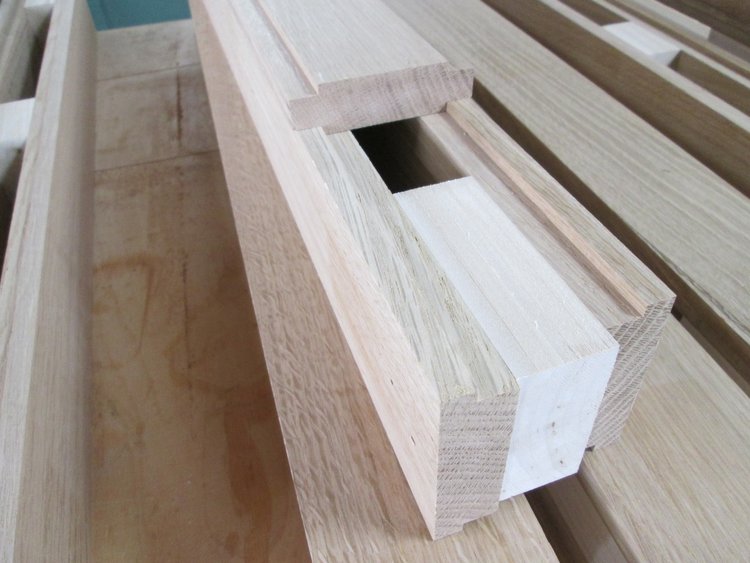
The new wooden speedboat will follow a similar construction plan as the first, built of wooden cross-frames and stringers. This time, however, I plan to use a more local variety of wood, starting with the lumber left on my racks from a decade plus of projects. This will include some White Oak, Alaska Yellow Cedar, some Mahogany. These are from long and straight boards, with no knots, and rot resistant.

But my 10-12′ American Cherry lumber is also great to work with, and can be sized appropriately for the strength and function needed. Building a hull stiffened by fiberglass cloth, embedded in epoxy to keep the water out, is a far more important factor than the wood type.

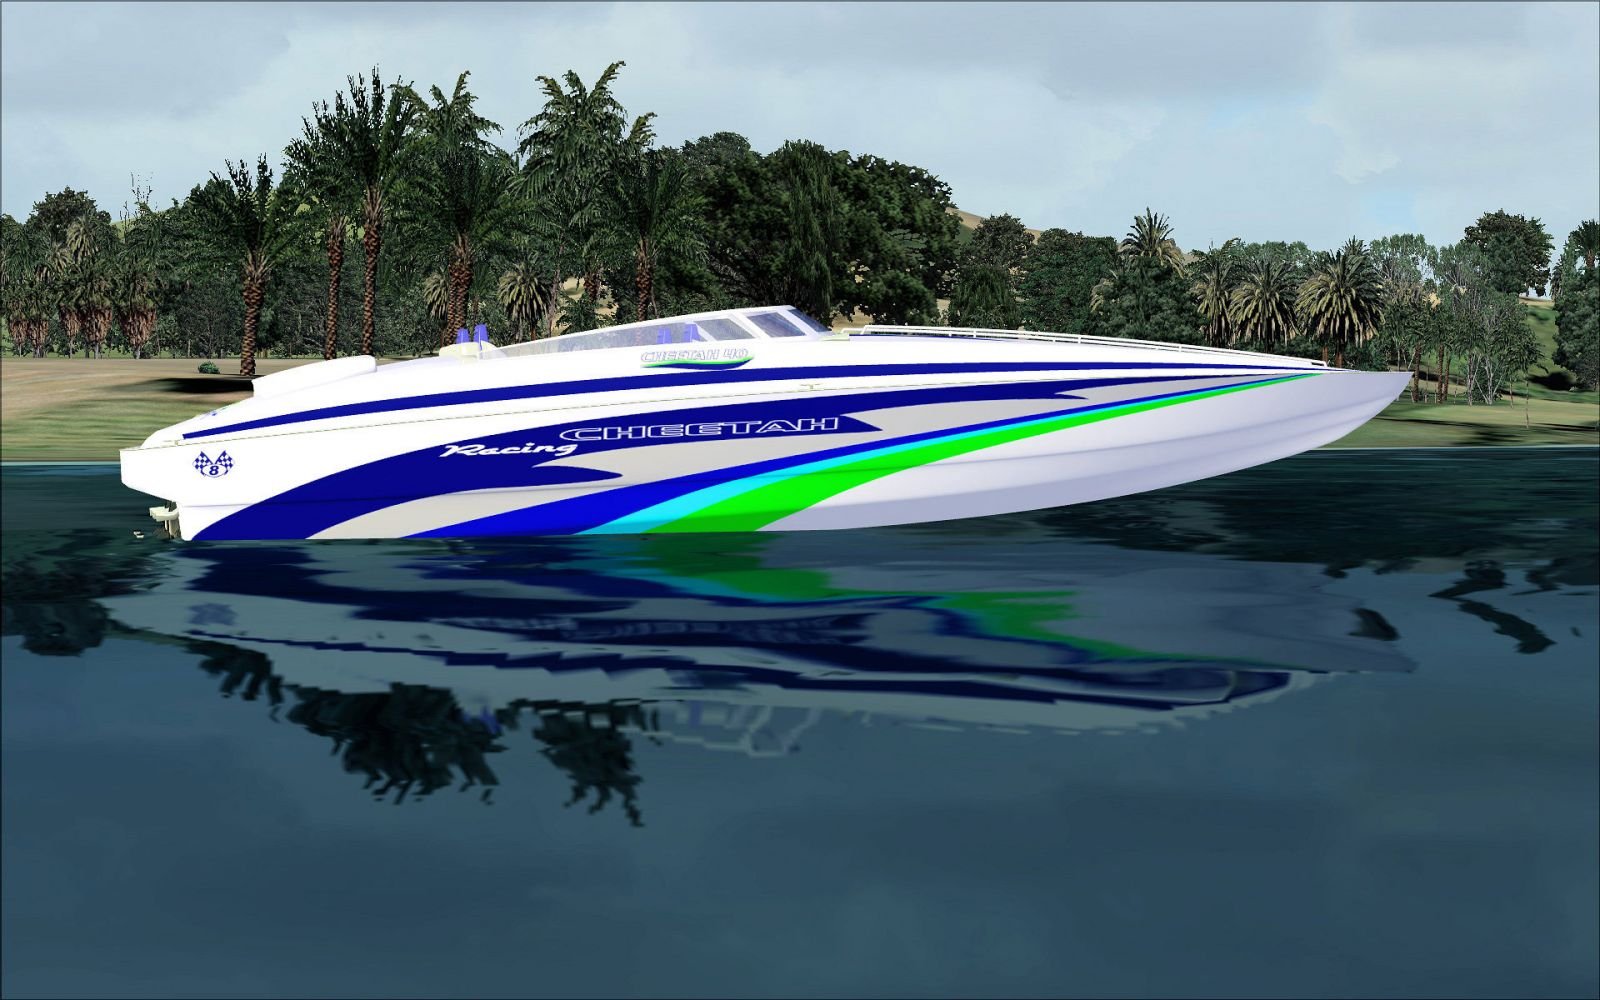
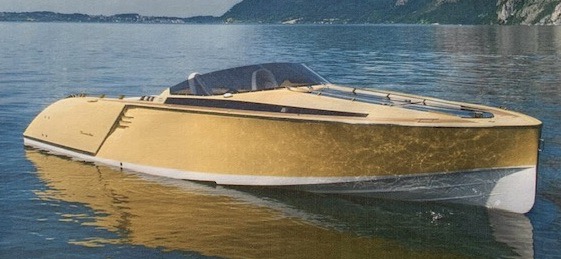
The design concept has firmed up as well, taking inspiration from boats like the Frauscher below.

Some examples of work from my design program are shown below. This is not exactly the boat I am building, but it shows what fun a fairly simple program can create.

The boat shown below is also not the exact model I used for the frames. It does however, show a more vertical bow line, and forward leaning transom above the waterline.

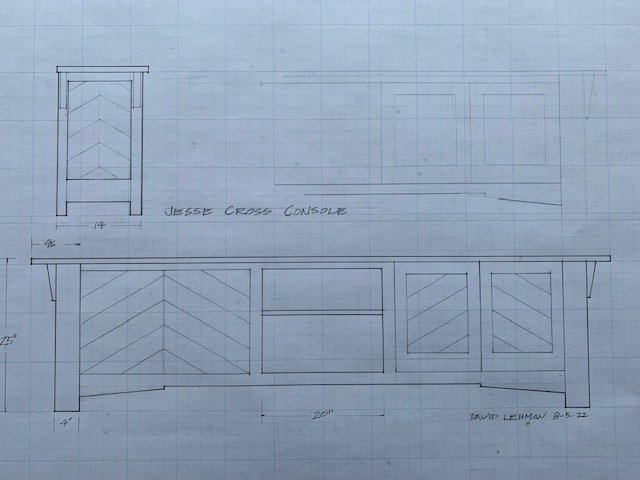
The first serious step towards production was making a series of PDFs of the bulkheads from my boat design. Below is cross frame number 6, third from the front. My old computer with the free boat design program is 25 years old, and with my lack of tech savvy, I hoped that it could still be used.

One day I came to the moment of truth. Was this to be only a design hobby or am I actually going to build a boat? I called Tyler at Cutting Edge CNC in Millersburg, Indiana to ask if he could use the PDF’s. He said that it was quite possible and he would give it a try. In few days later, he said bring the wood!

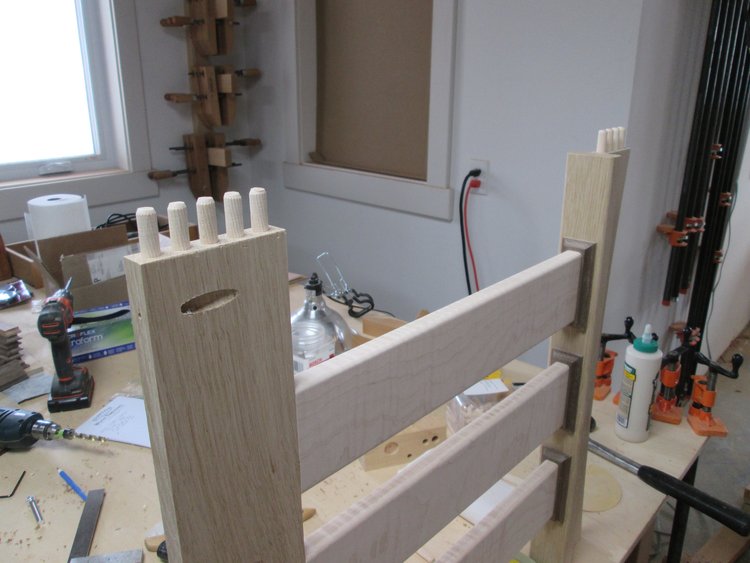
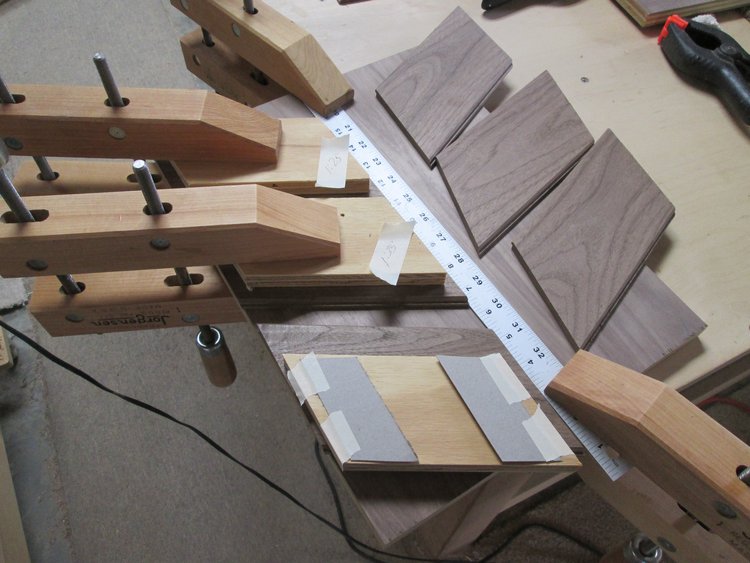
For the last boat, (frames shown on right), I used large patterns and assembled all of the frames from Alaska Cedar and Marine Plywood parts.

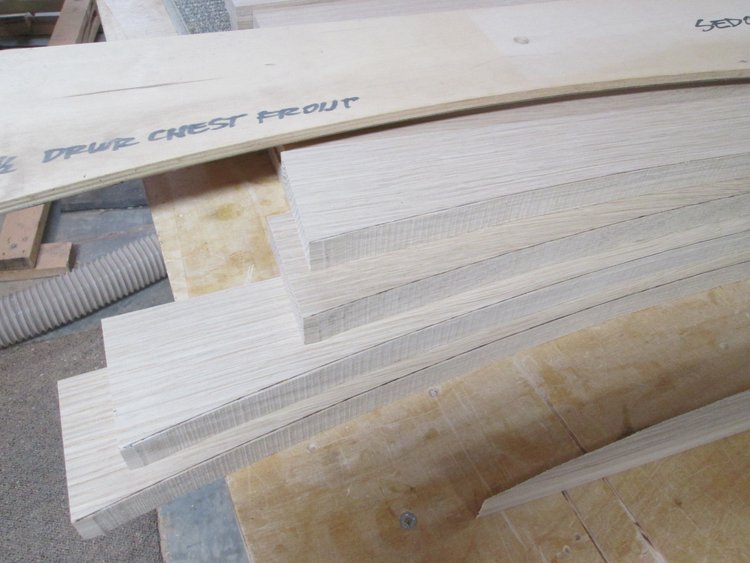
This time I am trying a different approach, having the frames cut from 4 x 8 sheets of Hydrotek plywood. Then I will reinforce them later.

At Johnson’s Workbench in Charlotte, Michigan, I bought the 6 sheets of plywood, and dropped them off to Cutting Edge. Another couple of weeks, and voila’ the possibility of a boat became real!

After I received the cross frames, I went back to my computer design program to review the actual model’s side view lines. This was for the final information about how to position the bulkheads vertically, especially the front 3 or 4.

With apparent careless habits from new computers, I did not press save one time, and experienced the unfortunate disaster of the old days of computing. The current design concept was not shown above. . . because it is gone.

None of my efforts, or advice from experts to recover the design worked, and there I lost many hours of irreplaceable work. There is a lot about building boats that is like life.

Till next time . . .

Intuitive Boat Hull Design

The physics and math of fluid flow across a hard surface is pretty complicated, but taking a common sense approach can bring a good bit of direction to a new boat design. The first main decision is whether the boat is supposed to go slow or fast.

Slow, displacement boats when moving, stay nearly at the same depth as a rest. Speed limits are defined mostly by the length of the object, and the length-to-width ratio. The row boat below is beauty in motion, although quite slow.

This God designed hulk of a whale is a far more efficient displacement machine. Even though it has to push its full girth through the water, It has a super slick motion, with speeds exceeding 20 mph for short distances.

Wood boats can’t begin to replicate all the whale’s body mechanics of flex and fin stroking. But, human engineers have done some of their most successful design work, imitating performance seen in nature.

Another group of boats are called semi-displacement, for their ability to go efficiently at a slow cruise, and still go beyond displacement speed with more power. Generally, the more pointed the front, the less effort to go forward. A catamaran uses two hull halves to make even narrower parts, with sharper entries.

At the back of the boat, the deeper it sits, the more wake it produces, and the less efficient the power-to-speed ratio. Below is a fine design of a semi-displacement hull. The front of the hull is a cutting edge; the water flows to the side and under the boat. By the time it gets to the transom, the water returns almost up to the original water line. That leaves very little turbulence, or wake drag.

But that’s all academic if you want the boat to go fast, with grab rails! Fast boats are designed to ride on top of the water, and have to be powered strong enough to push the hull up on plane. Then the water touches a much smaller friction pad, generally the back half the bottom or even less.

The contact area is smallest on a flat bottom like some of the old traditional woodies, but that gives the most pounding ride on choppy water. Ocean racers like the beauty below use a steeper dead rise angle from the bottom to the side, up to 24 degrees, giving a more stable and comfortable ride for aggressive wave hopping. By the time they power up their twin 450’s, they may have only the back third of the boat hitting water, some going over 100 mph.

Principle 1 of intuitive design: Define your speed goals and imitate success! I have reinvented the wheel enough times to realize a bike really cannot steer from the back tire, for example.

Principle 2: slow boats are usually wider to their length, and fast boats get narrower. The ocean racers generally are at least 3:1 length to width. My first boat was 20 ft. long and 6.5 ft. wide for a slightly more than 3:1. However, for a smaller boat, it gives up some lateral stability, and overall carrying capacity. The new boat will be 20 ft. to 7.6 ft wide or 2.6:1. This will provide the extra buoyancy for a few more grand kids to jump on.

Principle 3: the dead rise angle. The Raveau Racer above, built by Bob Walwork, has a flatter bottom angle. It is a single purpose boat, run mostly in calm water, as the Raveau drivers tend to be addicted to speed.

For my boat, I have narrowed down to a more general purpose speed boat, with 20 degrees dead rise, which seems to be a pretty good mix of a comfortable ride on flat water or some more choppy conditions. it is some guess work, but some things in life don’t have mathematical answers.

If you look at the bold black outline, you can see slight tip in at the transom, or stern. This “tumble home” is a consistent characteristic that will make it feel comfortable around the old classics. Nearer the middle of the boat, the green Number 3 cross frame, shows that the outside of the hull has a slight outer tip. The light lines show this tip out angle increases more towards the front of the boat, to keep water spray out.

Do a little research, weigh the options, try to evaluate the pros and cons, and then there comes a moment of decision.

More to come. . .

Speed Boat Design 1

A new boat! The original 2016 LC20 “Redemption” was a grand learning curve, and a great success in many ways. The first boat was more like a sports car, where “look good” and “go fast” were pretty much the key intentions. But Jan had some bigger functional parameters of her own, along these lines:

“Well, maybe enough comfy space for a few of my friend groups, like 10-12, or 15 if mostly grandkids?”

“Maybe some drink holders and a cooler, a little party table?”

“How about an easy way to get back on the boat, if we do “diaper dipping,” a form of swimming with an upside down life jacket?” Should I even encourage that?

“Honey, it sounds like you are wanting a “Pond Tune” boat!” I said. “I am sure I don’t have room in the basement for that size of a boat, and I have never seen one done as a “Woodie.” The Kansas relatives above, Marge back left and Ed, second from right seem to be having a great time on Pete’s Puddle, if my reimagination serves me right.

Well then, Jan asks, “How about at least putting a few grab bars near the shotgun seat in case of mild turbulence?” Okay . . . there was the one time, we went for a slow cruise on the wooden boat, and a monster wave surf boat came cruising by, pushing up a four foot wake.

Instinct from driving a 16′ Marlin Scorpion speed boat in the 70’s took over, and I might of goosed it a bit just as we neared the edge of the wake, on an angled approach. The neighbors said we went airborne, including the motor, and Jan went from sitting high at the peak, to disappearing under the dash into the front cuddy on reentry to planet earth.

Being the doting and sensitive husband, I noted the important take away: add some grab bars!!!

A second accommodation for the new boat was drawing a wider beam, going from 6’6″ wide to around 7’8.” This design change adds extra carrying capacity, for that 8-10 plus chatty friend or family group, and will create better side to side stability.

The first wood boat, shown above, was modeled after the ocean racers, with a more pointed bow line. On the sketches for the new boat, e.g. below, I tended to draw a more vertical bow line.

This leans more along traditional lines, but some contemporary boats have used a near vertical front as well, and I find this example quite inspiring.

This time a windshield will be in the plan . . . stay tuned.

Boat Building Wood 2

Besides the Alaska Yellow Cedar, here are my observations about several more of the wood species popular in boat building:

White Oak – This is a tough, hard, strong, and rot resistant wood. It even has fashionable flavors. If you prefer, you can get the contemporary quarter sawn straight grain without the flake decoration. The market price is reflecting that popularity right now, as it is used in much furniture. You can visit a nice example of this style in the blog titled Butler Desk.

If you appreciate the flake pattern of the quarter sawn variety, it is a common trademark of the historic Craftsman Style furniture. In either case, quarter sawn white oak is very dimensionally stable and useful in boats. Since it is also quite heavy, I used white oak for the keel of my first boat, and other parts near the bottom to keep the center of gravity lower.

White oak is a good wood to steam bend, but as a general rule, I don’t like steam bent parts. They don’t follow perfect curves, as knots or grain variation affect the result. Much more satisfactory for me, is to cut the wood in slices which can dry bend the curve I need. With a three or more piece lamination, they self correct and create a beautiful curve without much need for additional fairing. The photo shows the three oak pieces making the chine stringer.

White oak might even be my favorite wood if hadn’t been for leading the entire field of wood entries in the competition for poking splinters into my hands.

Mahogany is next up. It is beautiful, strong, works well and is rot resistant. So many woods go by the name mahogany, including most of the souvenirs you might buy in a foreign country, that it gets confusing. For me, it needs to be the red brown variety, most likely from Africa, more dense with not so much grain porosity, and beautiful figure. This prime wood is expensive, but worth it in the most demanding circumstances, as shown by the number of classic boats it covers.

The Mahogany below, on my first boat, came to me a long time ago from a Swartzendruber Hardwood Creations garage sale of unused boards. It stayed in my shop 10 years or so before I had it sliced into 3/16″ veneer and put on the boat. The lighter top veneer planking is Curly Maple, which is does not compete well in boat building categories, except beauty.

Marine Plywood is most commonly available in two species, Okume and Meranti (Hydrotek), and an integral part of contemporary wood boat building. It has meet International standards for glue strength, water resistance, and having no internal voids.

Plywood is much more dimensionally stable than any solid wood, and as the inner core of a composite layer, it can make an exceptionally strong, curved surface. In my first boat, I used tongue and groove marine plywood hull planks, covered inside and out with fiberglass cloth embedded in epoxy.

There are no leaks and not much water ever gets in the boat, so rot resistance of interior parts is not a problem as in the old woodies. I prefer Okume plywood for its light weight, but used Meranti, (Hydrotek), for the cross frames, as it is cheaper.

I will return to Okume for hull planks this time, as I find it easier to fair with hand tools, and sanding boards. However, using T & G planks gives a self fairing head start.

This time around, I am looking around my shop, using some inventory hanging around for awhile, and buying the rest locally in Northern Indiana. The interior will likely be mostly Cherry. It is medium in weight, strength and shock resistance, but good for bending and it works so well with machines and hand tools very well.

The decision for the deck wood is still uncertain, but if I find a particularly gorgeous curly spalted maple plank, I might ignore the rules . . .

Boat Building Wood 1

The design of a new wooden boat requires thinking about the choices of wood. Trying to keep the water out of the floating space takes a combination of strength, stability, toughness and endurance. Western Red Cedar, Alaska Yellow Cedar, Sitka Spruce, cypress, teak, ash, white oak, and mahogany are some of the most highly prized woods for the beautiful traditional wooden boats of the last century. 

Some physical properties that matter most for the wood in a boat are: strength, density, hardness, stiffness, bending properties, moisture resistance, and dimensional stability. From a practical standpoint, some of those factors may be overridden by cost, being able to source them close by, and working ability. With all of that in mind, here is one of my personal favorites:

Alaska Yellow Cedar – It is not cheap, in 2023 around $10-15 / board foot rough. But everything else about yellow cedar is amazing. Mine came in generous 4/4 thickness 1″ x 6″ x 16 feet long with no knots. The prime vertical grain boards are straight, lay flat, are very stable and weather resistant. It is very light weight, and has an exceptional strength to weight ratio which is great for boats or airplanes. The distinctive aroma advertises its unique personality, which is like your Grandma’s cedar chest, spiced up a bit. 

But it really shines when you actually pull it off the rack and put it to work.

Alaska Yellow Cedar cross frames and stringers.

The tight consistent grain cuts so consistently and smoothly, that it makes hand tools seem like a good idea. A bonus is that it over a few years working with Alaska Yellow, it has never once given me a splinter. I love this wood.

Perhaps you can imagine how sorry I am, that the original stash I bought in 2013 to start the first boat is coming to the end.   But, there are other wonderful wood choices . . stay tuned.

Butler Work Station 2

The Work Station has all of the detail of the desk, but with the drawer cabinet discretely tucked into the right inside. The molding being added below is at the same height as the cross piece on the side, making the cabinet look like it meant to be there.

The horizontal molding is far more secure at the corners when placed into a groove, so this is the jig to hold the router as the cut is made.
The trim is planed to the thickness of the groove, and the long pieces fitted on the skirt board are glued in place first. The small L-shaped pieces are then made, partly on the bandsaw and with small holding helpers on the table saw.
Gradually, both end miters are cut back to fit the moldings at both corners. Then it is sanded and glued into place.
Try as I might, white oak likes to pull surprises, and this small knot hole was begging for attention. So I made a face grain plug, glued and sanded it flush. With a casual inspection, it can be found, and in one more way reinforce that it is a desk like no other.

Butler Work Station

The desk and work station are from the same design family, and the basics of frame construction has been the same. Below are two end assemblies for the work station, and one for the desk with the legs now doweled and glued together.

Here, the spiral fluted dowels have been glued in place, and the oval, angled holes are drilled for a pocket screw to eventually attach the leg frame to the top.
The front and back skirt boards are given an arched lower edge, and I have made several patterns of various lengths over the years. For these desks, I found my drawer chest front pattern and decided it would be perfect. The first step is to lay the pattern over and trace a pen line on the skirt piece. Then they are cut to rough shape with the bandsaw.
After the rough cut, the pattern is clamped over the skirt, or in this case, the lower part of the side frame. The router with a bearing guided bit trims them very predictably to the pattern.. By routing, and then moving the clamps, it eventually allows the whole curve to be shaped into the beautiful faired arch.
Next is the prep work of drilling the top pocket screw holes, making a cut out for the drawer, sanding and rounding the edge of the skirt to make it comfortable to the touch. The dowels of the skirt boards are added, glued and clamped to the legs.
The desk is assembled first, and it is always a relief to get through this assembly stage successfully, as much work has gone into the individual parts.
Then the work station is assembled and the drawer box cabinet added inside it..
To keep the end consistent with maple slats and walnut bases, I flattened the inside of the pre- assembled end, and routed a small ledge all the way around the insides of the slats and bases.The four white oak panels were added to fill the spaces, and are held in place by the plywood covers. Small gaps are left in between the parts, as some seasonal movement will inevitably occur.
From the outside. it is adapted to fit the family, and still enclose the drawers like they meant to be there. One step leads to another, and the light grows visible at the end of the tunnel.

Butler Desk 2

Barbra chose Rift Sawn White Oak for the main wood parts, and then we added some mildly contrasting curly maple for the slats and walnut for the slat bases. The combination is show above, with only a hint of the beauty coming after finishing.

The next step was making the slat bases. Small parts can be dangerous and hard to hold, and the end grain easy to chip out. So, I started routing the end profile of a wide block first, which will become four individual bases.

The extra front guide board with a small router hole was clamped in place temporarily. It helps to keep a short piece from pulling in towards the cutter, and the push block is a safe, steady place for the trailing hand.
When the end shape was finished, the wide piece was cut into four slender parts to make the slat bases. Then the edge routing was done, cleaning up any tear out from the cross grain routing. It is always best to make an extra or two just for practicing the next step, or some random problem.
Then the blocks were laid aside to finally do the inevitable, make a parts list and move ahead. For furniture, we start with any applicable ergonomic dimensions, and move on to functional corner joint sizes.
The slats are cut to width, and stood in place just temporarily to make sure the proportions are satisfactory. The Divine Proportion, or the Golden Ratio has always been fascinating, derived from Pi, which is close to 1:1.6. However, I reserve the right for my eyes to make final judgement, as in this look. The cross base is 1/2” wider on both ends at this stage, so what may seem like extra space on the sides of the slats should be fine.
Next, the construction of the cross pieces.

Then the unthinkable, I drilled an extra hole on the end of an irreplaceable slat. After a bit of critical musing, I routed out the drill hole, as shown below.

Then, I looked carefully through the scrap from the slat cutoffs, and found a piece to make the repair filler.
The filler was glued in place and when it was shaped down to size, I think it turned out to be on the short list of the best repairs I have ever done in many years of making mistakes.
You can tell it is the same piece by the left over part of the drilled hole, and lighter stripes that don’t wrap perfectly around the corner. The vertical brown grain is not exactly aligned either, but it will successfully hide from all but the closest inspector. Should this piece ever come into question for authenticity, a reader of this blog could make the judgement.

As I was deciding whether to turn the middle slat face inside or out, the figure on the edge gave a suggestion of a tear drop. It reminded me that not all things get fixed so easily, and some tears are left that only God can wipe away. The slat stayed facing out.

Butler Desk 1

On the last day of September, in the middle of one of the most colorful and durable fall seasons, an inquiry email came from Barbra Butler. It turns out that she had a friend who came to the MCC Relief Sale in Goshen a couple weeks earlier, and mentioned seeing some work I had donated to the sale. She took a look at the website my son-in-law Danny made for me, and used the submission form to email me.

We discussed some questions on the phone and arranged for her and her husband Jim to come to the shop and check it out in person. The following Saturday, they took a 2 1/2 hour road trip to my home. We took a house and shop tour, looking at design ideas and construction techniques. It was a pleasant and rewarding conversation heading the same direction toward a desk and work station.

The first step was redrawing a desk that is on my short list of all time favorites, to meet the proportions Barbra was wanting.
The first decision was the wood type and Rift Sawn White Oak was picked, for the most straight grain and least medullary ray figure. These 9-10 footers fit the bill perfectly.
With the design and dimensions in my mind, I began laying out the pieces for the most important parts, the tops. For the 27 x 60 top, one wide board was able to be cut into two 60” halves and flank the middle in a most pleasing arrangement. The trio turned out to be 3/4” too narrow, so I spent considerable time with the other boards for another suitable match. In the end, nothing else struck my fancy, so I went with the eye over the tape measure.
This is the lay out work on the shorter top, 30 x 48. The focus does not do justice to the harmony of arrangement which will show up as the piece comes together. These pieces are set aside to be sanded through a wide belt sander at my favorite wood supply, Nisley’s Sons in Goshen.
Next was leg making. The heavier proportion called for dimensions not possible to find in Riftsawn White Oak, and it was not uncommon for the best of Prairie and Mission Styles to have hollow legs. In the past, I have used a 45 degree locking miter, but I wanted to have part of the middle solid for the best holding of the dowel joints. So I decided for a center fill of soft maple.
After the sides were glued, a groove was routed out, and a cap piece made. This is to give the best grain match all the way around the leg.
The caps were about 3/8” thick, so I used 7/8” support boards on each side. The Jorgensen clamps are 30 years old, and still pulling their weight with amazing strength.
Here is the leg after some basic machining to dimension, with the caps on the sides. The difference between face and edge grain can be easily seen. However, it nearly disappears when the corner is routed with a 3/16” round over. Then the eye relaxes, and the hand is comforted with the sharp edge is gone. Next up, making skirt, cross pieces, slats and slat bases.

Sofa Cabinet

In a beautiful tall living room overlooking Sweetwater Lake are stunning views galore, and eclectic design touches near at hand: the counter tops, the antique doors, the contemporary lamps and the real life boat functioning as a bed overhanging the balcony above. The room is generous in proportion as an invitation to a crowded party, and a large sofa sits facing the window side, leaving the back exposed to the entrance.

Why would you not put a long low cabinet to balance the back of the sofa, and give it room for the mandatory games, an oversized travel book maybe, and an elegant light or two? And why would you choose any style besides chevrons for the theme of the piece?

A few sketches boiled down to this one, and the final construction drifted to the right side.
Walnut was the wood of choice, and to give the best chance of a long enduring life, many dowels were used to make strong joints. There was a knot on this board which was laid out on the inside of the bottom skirt board, never to be seen, but I couldn’t resist drilling it out and replacing it with a solid face grain plug.
The back frame is being joined to the bottom, with biscuits to align the edges.
Now the front face and legs are being assembled to the case, using sixty-four dowels.
Clamping a cabinet that is 8’ long presents some special problems, with clamps hooked to each other or to middle face frame dividers. All the joints need to be tested without glue, to make sure they go together well, and then finally clamped with glue. The second time is the more nerve racking as there are only a few minutes working time.
The lower angled braces served to add a bridge arch design element, but also adds two more dowels at the post ends, and more vertical strength. The basic case is complete.
The cabinet ends and doors were designed to have chevron patterns. I picked a board with interesting grain, and cut it in 3” widths, and then sliced those in half to have enough chevrons all from the same board. They were routed with a lap joint, cut to angle, and glued to the panel center line. The assembled panels were then installed into the door frames.
After a few decades of messing around with wood, I still failed to fully account for the personality of walnut, as it presents with a bit more variability of sheen and color, depending on the orientation of the individual piece and the light source.
Back from the finish shop, with handles installed. Overall, I find this piece sophisticated and elegant, strong and graceful. Maybe it is just how life goes, we all like to be seen in the best light.
Waiting for the move to a gorgeous living room, and to get filled with games, fun times and memories.