Living Legends Part 3

In the process of designing my boat, I was looking around at classic wood boats and came across some Raveau boats.  They have beautiful lines, simplicity of design, and are built for speed. I found them very inspirational.  The photo below is  a 20′ Raveau driven by Steve Koenke, with a 65th anniversary special edition Mercury 200 hp engine.  It reached speeds in the mid 70’s.

Raveau 20 - 2.jpg.jpg

These boats were first designed and built by Marcel Raveau who moved from France to Long Island, NY in 1929.  By the mid 1940s, he was establishing a great reputation, as his boats were consistently winning the Albany to New York Marathon.  In 1959, Marcel moved to Sarasota, and Bob Walwork got a job as his apprentice at the Kiekhaefer Corp (Mercury).  They tested the Raveau race boats at the Mercury Saltwater Test Base in Sarasota, FL and also at Mercury’s Lake X Test site near Orlando.  They mostly built the boats during the week and raced all over the state on the weekends during the early 1960’s.

unnamed.jpg

Bob had driven his first racing boat, a Jacoby midget hydroplane, when he was eight, and got “hooked.”  By age eleven, he started racing in the American Power Boat Association races, leading to a lifetime of sport and pleasure boating.  In his teen years, he worked at a family marina in Penn Yan, N.Y. and developed a love for the mahogany runabouts.  In 1951, Bob joined the American Power Boat Association, and was Northeastern Divisional Champ in the “JU” Class for three years.

Bob married his wife Donna in 1960 and went racing the next day.  The photo below shows where one of his friends got some lipstick and wrote “JUST MARRIED” on the side of his boat.  Finished third that day….first race he lost!

unnamed-1.jpg

After three years with Mercury, Bob left to work again with Marcel Raveau, building, experimenting, and racing.  During this time, he had racing victories in the prestigious Orange Bowl around Miami Beach, and in the Orange Bowl Six Hour and Nine Hour Endurance races.  The photo below shows Bob testing a 17′ Raveau with a 150hp Mercury.

DSC00416.JPG

After Marcel retired and returned to France, Bob continued building the boats until 1965, when he became General Manager of Fitchett Sales Co. distributing several major fiberglass and aluminum boat line.  In 1974, he became VP at Manatee Boat Co. supervising production of around 1500 boats a year.  In 1984, Bob started working with Stingray Boat Co. in Hartsville, SC designing and prototyping new models, where they patented the new Z-Plane bottom.

Bob is now finally trying to retire and in the process of moving out of his shop where he has been working for the last 28 years.  Originally, he opened the shop to do prototype work for other boat companies.  When a longtime friend talked him into building a Raveau again after about 30  years, it was so much fun that he eventually stopped the prototype business and started building Raveau boats again. Since 1995, Bob has built 35 Raveau boats in this shop.

In January 2016, I was privileged to visit Bob at his shop, make a new friend and witness history in the making.  The last Raveau is a 25 footer, which hasn’t been in the water yet.  His enduring efforts to preserve a classic design while improving hull performance are appreciated by many owners.

IMG_1306.JPG

Meanwhile, regardless if this is my last boat or not, I have enjoyed being a part of the wooden boat builders fraternity.  They have a passion for the craft, and respect for anyone who tackles the challenge to build one.

My most recent challenge was filling all of the screw holes that I used for holding parts together as the epoxy was setting. Since I had used wood washers and then removed all of the screws, the holes were only around 1/8″.

unnamed-2.jpg

 I experimented with several wood putties, a mix of epoxy with wood dust, and some end grain dowel rods.  None of these methods worked out very well for me, because I did not plan to use a filler stain.

unnamed-3.jpg

Eventually, I settled on making wood plugs of from the cutoffs of the wood I had used for the boat.  It seemed more likely that over time, the wood plugs would age the most consistently in color with the other veneers.  I drilled the screw holes in the  mahogany parts out to 3/8″, and made 3/8″ face grain plugs.

unnamed-4.jpg

There was a fair bit of color and grain variation, so I made plugs from a variety of areas of the wood, to match as well as possible, and placed them temporarily in the holes.  Then I removed them one by one, injected the hole with glue and tapped the plug in place.

unnamed-5.jpg

I decided not to drill out the maple holes, and left them the 3/16″ size that they were originally.  I tried end grain plugs, which were always too dark, and finally came up with a way of making small face grain plugs. I made 1/4″ square cross grain cutoffs about 5″ long.  Then I put them in my drill and turned them on the sander to create tapered plugs.  The end notched stick helps to stabilize the turning piece.

unnamed-6.jpg

When they were about 1/8″ at the point, I stopped the drill, and cut off about 1/2″ for an individual plug.  Then I injected the holes and glued the face grain plugs in place.  Below you can see both the 3/8″ mahogany and the 3/16″ maple tapered plugs.

unnamed-7.jpg

The next step was cutting them off with a flush-cut, pull-stroke saw, and sanding them flat with the surface.  This I repeated around 500 times and after sanding with a special hinged, variable-angle fairing board, they began to retreat from being so noticeable.

unnamed-8.jpg

After more fairing and sanding, it was time to put the seats and gauges in temporarily to see where the boat is headed.

unnamed-9.jpg

Next step up will be taking the boat out the wall where you see temporary framing. . .

unnamed-10.jpg

Living Legends Part 2

Another inspiration is my uncle, Russ Liechty, who was born in 1930, and grew up on a farm near Pettisville, Ohio. Being the last in a family of nine children, he felt no particular need for higher education because his Dad did quite well with only a sixth grade education.

His dad (my grandpa) Joseph Christian Liechty, was an entrepreneur who had several dealerships, selling Maytag products, Chrysler automobiles, John Deere tractors and a farm to complete the mix. He provided plenty of machines to take apart around the farm. Below is my Grandpa, Grandma Emma, my Mom and Dad, Uncle Wayne, cousins Shirlyn and Ellen with my sister Anne between them, and me in front of Grandpa.

unnamed.jpg

One by one, the brothers began taking over the family businesses. Russ did a little of everything, from mechanics to farming, and anticipated joining the car business after school. After high school, he drove a truck for a year until his sister Doris (my mother), who was at Goshen College, persuaded him to give college a try. Russ agreed to go for one semester, and got hopelessly “hooked.”

There he thrived and found a stimulating opportunity in education. This lead eventually to a PHD in Psychology and a career in college Administration and Student Development. For this reason, the guys at the factory in front of his shop call him “Doc” Liechty. The photo below shows Uncle Russ and Aunt Marge in the early days.

unnamed-1.jpg

The photo below shows my Grandma Emma Liechty and all of her children: Aunts Lorraine, Mary, and my mother Doris, Uncles Don, Wes, Herman, Wayne, Harold and Russel, along with Don’s wife Lois, Carly June and one unknown to me.

unnamed-2.jpg

Uncle Russ’s mechanical roots were tangled deep though, and he never lost the childhood interest in cars and trucks. I would put my money on him to be able to identify any year of Chrysler car or Dodge truck for the last century. (Added note: he reviewed this post for dates and details and did not refute this claim!)

A few years back, he bought a 1947 Dodge 2 1/2 ton semi-tractor in rather rough condition for $600. This began a five year full restoration that required complete disassembly down to the bare frame. Every part was cleaned, repaired, or rebuilt as necessary before reassembly began. The major components, i.e. engine, transmission, starter, generator, etc were all rebuilt by experienced professionals. It now has six new tires, all new glass, interior mats, door panels, headliner and seat upholstery. Uncle Russ did the body repair work, but the final painting was done by a professional.

This led to being featured in a major truck magazine. This is a really big truck for a man with a really big vision. It has an air horn to match.

unnamed-3.jpgunnamed-4.jpg

The Big Red truck is now estimated to be worth around $25,000 and is a parade and show favorite. Uncle Russ also restored a 1919 Dodge touring car, a 1949 Chrysler Windsor, a 1962 Chrysler Newport, a 1964 Dodge Dart convertible, 1964 Rambler American convertible and a 1936 Dodge 1/2 ton pickup shown below.

unnamed-5.jpgunnamed-6.jpg

Actually, this truck might be the best of all of the featured choices to pull the boat, should it ever get done. Currently, I am working on putting the mahogany veneer on the sides. This step required some special clamps to help hold the pieces in place as I was shaping them down to size. They have an inner concentric surface which tightens up as I turn them. The outer piece is just to hold the large floppy pieces in place during shaping.

unnamed-7.jpg

Here is the preparation for the second piece.

unnamed-8.jpg

Jeff Margush helped provide a full size pattern that helped create a good line down the side for the bottom of the veneer.

unnamed-9.jpg

And finally, Jeff and I epoxy the pieces in place, essentially completing the last of the major wood parts added to the hull. This is a huge milestone to pass, and the hope of getting in the water this summer.

unnamed-10.jpg

Patience, persistence and perspiration make an unbeatable combination for success.

Napoleon Hill

Living Legends Part I

There are people who do lots of ordinary things, but have an extraordinary itch to scratch or a special question that begs an answer.  They live in the present, and usually provide for the daily demands with an 8-5.  The dream, though, is fueled by passion, a respect for craftsmanship, and maybe a dose of love for history.  These are people who have inspired me.

The payment for following a dream, is partly satisfaction from the eventual product, but the process is so long that it must offer its own reward.  Sometimes, this comes from a new design idea or a solution to an unforeseen problem.  In other cases, it is just the camaraderie with others of like mind, who also bit off a bigger bite than they could chew.

Straight out our back door, to the path through the woods, around the pond, past the Hillbilly Shack, behind the house, and next to the chicken coop, is a big garage that has lots of machines, toys and a Man Cave.  That is where Doug Martin is rebuilding a ’49 Chevy 3/4 ton pickup into a street rod.  That huge rear tire beside him, will help show the purpose of this modified vehicle.

unnamed.jpg

When it is all said and done, it’s going to be powered by a 12 valve Cummins Diesel, with twin turbos producing 75 pounds of boost, making 11-1200 ft. pounds of torque at around 750 horsepower, and throwing a big column of smoke.  Big truck for a big man.

unnamed-1.jpgunnamed-2.jpg

The power is transferred to the back tires through a Ford 9″ rear end, and a seriously customized frame.  The floor and fire wall had to be rebuilt to accommodate the front end changes, and the top was chopped around 6″ to create a “Cool” attitude.

unnamed-3.jpg

Right now it is in the dirty stage, cutting and welding.  After all of the assembly is complete, it will be totally taken apart to paint and polish, with a hope of getting street ready within a year.  As I inspected the truck the other day, I did inquire where the hitch ball would be placed, for pulling my boat.

unnamed-7.jpg

On the boat side of the neighborhood, the next step here is attaching the veneer to the top.  I first added the mahogany outer frame pieces in progress below.

unnamed-4.jpg

Next, I began filling in the center triangle with pieces of curly maple band sawn  3/16″ thick.

unnamed-5.jpg

Finally, the stern extensions were covered with 1/4″ figured mahogany.  All of these boards came from a Swartzendruber Hardwood Creations garage sale a few years ago, and were just waiting for the right project.  Even though the mahogany boards came from different trees, when all of one surface matches, it is well with the world.

unnamed-6.jpg

” The artist is nothing without the gift, but the gift is worth nothing without the work.”
Emile Zola

Boat Construction Details

At my pace, a few cutting boards or a mirror frame can usually be finished in a week. A queen size bed takes more like a couple of months and a dresser could stretch into most of the winter. So, having a goal of building a 20-foot speed boat in a year did not turn out to be realistic.

After all, the cherry and curly maple stair railing took a little over a year. One reason was that a friend gave me a nice piece of ebony wood, and Jan said that having a little black accent in the newell post would help it relate to the black piano. Of course, this added time to the process but now I can’t imagine it any other way.

unnamed

The top ebony trim is actually a mitered frame, with the corners reinforced by a 45 degree saw-curf insert.

unnamed-1

The stairway also took two 45 degree turns, which created several complications. Since I had strengthened all of the lower 90 degree riser corners with a dovetail joint, I decided to do a dovetail joint here as well. That involved a special holding jig, and much trial and error to get it right. Also, where the bottom molding meets the corner, it did not cleanly join the other wall piece and need a special transition piece to be made.

unnamed-2

In the same way, the boat has brought challenges that took longer, and added complexity, but become valued parts of the final product. When I showed my designer friend Jeff the gauges for the dash, he noted that the square ignition switch plate did not fit with the round shapes of the other pieces.

unnamed-3unnamed-4

I agreed, so I found a bolt, some washers and nuts to hold the switch plate, and mounted it in the drill. By spinning it against the sander, eventually the square corners gave way to a round plate.

unnamed-5.jpg

Unfortunately, the screw holes for attaching it to the dash were also cut off, so I needed to make a wood washer to hold it tightly for mounting. Some time later, this is the result:

unnamed-6.jpg

unnamed-7.jpg

The navigation light mounting flange is made to hold the light tube perpendicular to the mounting surface. However, where the light goes on the back right panel would not be true vertical. So, this suggested that I make another custom flange, so it can be rotated for the light to be straight up.

unnamed-8.jpg

The outline of the cockpit had the earlier problem of looking too square. I started by adding the corner round, and then made a top corner piece to join the perimeter moldings. The problem was that the piece needed to make a curve and a twist to connect the dash to the side. When you count the number of failed attempts, you can imagine this was not the fastest way to go either.

unnamed-9.jpg

The second corner went better than the first, and led to another molding across the top of the dash. This was complicated by the fact that I did not want to put screw holes through it to attach it to the dash. Being curved did not help anything. Below is shown the clamps and special hold-downs to get it glued.

unnamed-10.jpg

Next came the side moldings, where the deck top did not have the final veneer surface. So I added temporary screw blocks to clamp the molding in place. Spring clamps are not as strong as screw clamps, but if you have enough of them, they work pretty well. The blue tape on the blocks is intended to prevent glue squeeze-out from attaching the blocks to the hull.

unnamed-12.jpg

Then it was time to add the veneer to the raised part of the deck. I started with 1/4″ cheap plywood patterns to give the best yield and grain direction on the mahogany.

unnamed-13.jpg

These pieces had outside and inside contours that needed to have perfect curves. The outside was left rough with some overlap to shape later. The inner curves had to be pre-shaped to beautiful lines with my favorite hand tool, the block plane. By setting the blade a bit aggressive, and turning the body of the plane diagonal, it is possible to achieve smooth inner curves that are superior to band sawing and sanding.

unnamed-14.jpg

Below is the step of rough fitting the top veneer cover pieces, and then clamping and screwing them in place. I attempted to have as few screws as possible, but some filling and plugging will be needed later.

unnamed-15.jpg

unnamed-16.jpg

Then, the center bridge needed the corresponding veneer pieces to tie it together.

unnamed-17.jpg

And so, time marches onward. I have generally thought that I am never lost if I am not out of time. The problem arising is that my Dad’s big 90th birthday party reunion is occurring at Little Eden camp in five months, and the boat must be there. This doesn’t leave room for many more detours.

Fortunately, all I have left is the curly maple top veneer, the mahogany transom veneer, side veneer, fairing and hand shaping all of the final contours, paint and varnish, installing the fuel cap, navigation lights, tie bars, running the wires for the gauges and rigging, making a cradle to hold the boat on its side, a windshield and a trailer…

“Time sometimes flies like a bird, sometimes crawls like a snail, but a man is happiest when he does not even notice whether it passes swiftly or slowly.”

Ivan Turgenev

Building the Deck Top

In some ways, the insides of things are most impressive, showing the details of construction and engineering.  Some car hoods just have to be lifted, and doors opened to get the whole picture.  The face of a clock is only a small representation of the mechanical parts that run it.

So, building the deck top was a bit sad as part of the interior is now permanently closing, hiding some of the previous work.  Below is a view of how the boat looked at the stage of adding long stringers to the cross frames.

unnamed

But time marches on, and this is the year the boat needs to be finished.  Here is the way it looked with the top frame work completed.

unnamed-1

As done on before on the hull, I first cut 3 1/2″ planks, this time from 3/8″ Okume marine plywood.  Then, the edges  were routed with tongue and groove cutters, which allowed easier bending in both length and width.  This kept the surfaces lined up for gluing, which made fairing easier.

unnamed-2unnamed-3

Below shows the first planks being positioned and screwed down.  I later remove all of the screws and fill the holes with epoxy.

unnamed-4

The photo below shows the plywood pieces covering the bridge between the dash and the front jump seat.  The blue tape is there to catch any glue that might squeeze out.

unnamed-5.jpg

More pieces are shaped and added.  Here the blue tape is holding them together temporarily.

unnamed-6.jpg

When the corner pieces were temporarily screwed in place, I used a self-guiding flush cutter to follow the contour of the curves.

unnamed-7.jpg

To inset the curved ledge for the hard top, I routed a cove shape on the plywood top.

unnamed-8.jpg

Then the pieces were turned over on the bench to rout a second cove from the bottom side.  When turned right side up again, I finished with a small flush cutter to trim the edge square again, completing a 1/2″ lip which follows the curved outline.

unnamed-9.jpg

Next, I made the tongue and groove pieces for the hard cover, and added plastic underneath before gluing them to the frame.

unnamed-10.jpg

The boat is still a long way from being done, but this step completed is kind of like getting Oral Pathology done in dental school.  It is a great relief.

Whatever Floats Your Boat

Integrity can be defined as: the quality of being honest and fair, adherence to a moral or artistic code, holding together, being complete or whole.  Most success just comes from enduring preparation, and stands on the quality of the foundation laid.  If work is done with integrity, it will be sound and complete.

It reminds me of a cool, clear Friday evening in October of 1971.  I was in the stands at a Concord High School football game, the only year I did not play on the team.  As high school friends sometime do, they tend to encourage behavior not strictly endorsed by the Establishment.  This evening it was an invitation from a friend with a pickup truck, to take TP to our orchestra teacher’s home and gift wrap his trees and house.

I imagine the discussion with my dad about the evening plan was rather vague, and shortly after the game, half a dozen of us were off to the grocery store.  Then the guy in the truck dropped us off at the appointed house, and said he would be back in a few minutes, waiting just around the corner.  We started the work at hand.

A few minutes came, the pickup truck returned, and just as we were doing the finishing touches, another car pulled up behind him with some lights flashing.  All of a sudden, the pickup truck with those friends, did not seem like my best option to get home.  I also was not interested in adding a police report or a trip to the station to the explanation I would have to give when I got home.

Fortunately, I had been running cross country that fall and was in the best running condition of my life.  I took off down a different road out of the subdivision, and settled in to a quick run with a bit of moon to see by.  I have often wished I had a stop watch going that night, because with the running training I had done that year and fueled by the adrenalin of fear, it seemed effortless.  This was preparation at its best, and I suspect it was the fastest seven miles I have ever run.

Upon arriving at home, I quickly got in bed and went off to sleep.  The next morning, I got up, ate breakfast, and walked … across the neighbors lawn,  through the woods past the Junior High, and over the bridge at Yellow Creek, up the hill to Concord High School.  It seemed a bit higher than normal.

At the school, I climbed up the steps to the bus that Saturday morning, almost exactly 44 years ago, which was headed off to the Regional Cross Country meet where I was scheduled to run.

unnamed

My coach, Dale Kelly, was optimistic for my chances, because I had won the Northern Lakes Conference two weeks before and qualified high in Sectionals.  I had not mentioned the events of the previous twelve hours.

In contrast to the evening before, the cross country race was only two miles, and it was easy to see the course marked out for us.  I started strong on my normal pace, but the pain that usually waited to the end came on early. It was apparent that under the surface where a good kick usually waited, there was no reserve left.

I had not strictly adhered to the code of sports preparation, and the result was a disappointing waste of perfectly good preparation.  That boat “did not float.”

This, I am hoping to avoid with the current boat building project.  The stakes are higher.  Any volunteers for the first ride?  I worked hard to strengthen the transom, the cross frames and the under structure so that it would hold together, and be solid in action.

unnamed-1 unnamed-2

Even after a boat is holding together well, it is not complete.  Making it look beautiful requires the same quality of preparation.  A fair line or a smooth surface may be so easy on the eyes as to be unremarkable, but a lumpy contour screams for attention and sticks out like a sore thumb. Success all depends on the the structure underneath.

I am currently working at covering the front “jump seat” with a hard top.  The first step was defining the outline with a curved moulding.  Here are the patterns I made to start with.

unnamed-3

Below is the corner piece being glued in place, with masking tape to prevent glue squeeze out from affecting the finish later.

unnamed-4

Next, I added the curved connector moldings.

unnamed-5

Then I refined the inner curve with some carving and sanding, joining the lines of the corners and sides.

unnamed-6 unnamed-7

And last, I built the frame for the removable hard top, inside the jump seat moldings.

unnamed-8

After some fairing, it is about ready to cover with the deck planks.

unnamed-9

Below is the boat as it stands, ready for decking.

unnamed-10

My daughter Adrienne came to visit recently, and then wrote of reading Psalms 33:5 from The Message:

“God’s word is solid to the core – everything He makes is sound inside and out. He loves it when everything fits, when His world is in plumb line true.”

She said, “It is so neat how the intricacies of the inside of the boat, which will not be seen by most people, have been made with such integrity.”  This, she thought, reflects the character of God.

Long Days and Deck Planks

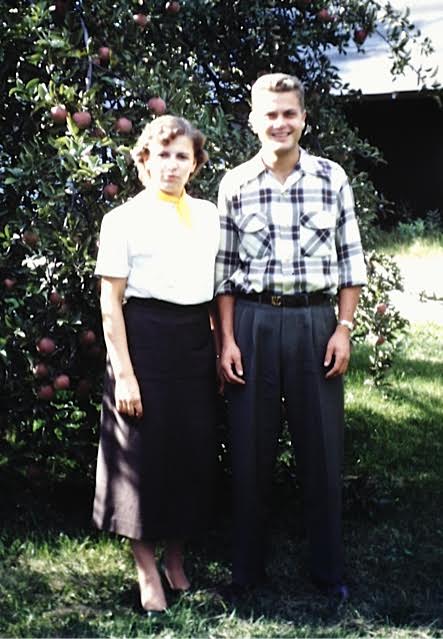
As long as I can remember, I have been intrigued by adventure. This curiosity emerged pretty young, as do many traits of personality. We lived in Indianapolis, and when I arrived, there was already a big sister Anne. By the way, I need to give a huge credit to my Dad for taking and saving all of our old family pictures.

unnamed

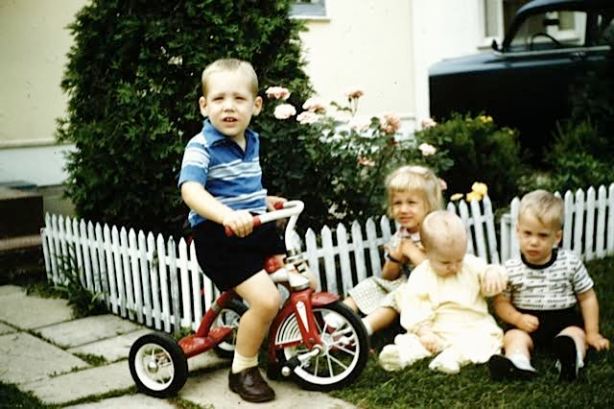
Below is a photo of us sitting beside the small picket fence and roses in the front yard, with our cousin Danny Swartzendruber. He might have been giving us a big idea.

unnamed-1

One day, sister Anne and I decided to go out and see the world. Considering that we went together, I have to imagine that any sibling rivalry was temporarily calm. It is also unlikely we were at odds with our parents. If we were, we were too inexperienced at running away, to pack even the most basic provisions of food and water. Apart from a skinned knee, we were generally contented and amiable children.

unnamed-2

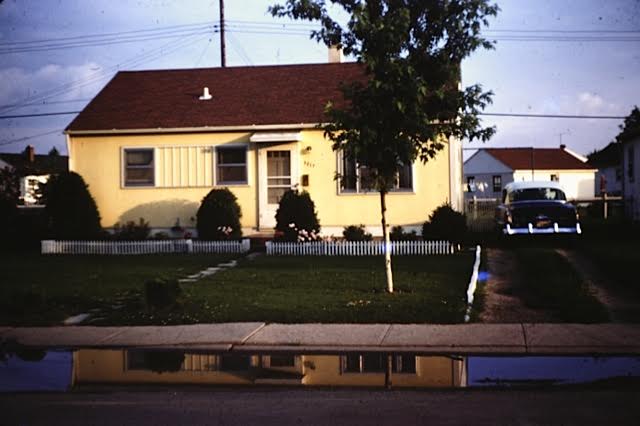
Our house was at 3712 21st Street, about a mile from the Indianapolis Speedway, in the Eagledale neighborhood. It was a warm summer day, and for whatever reason, we headed east two blocks to Kessler Boulevard, on our tricycles. There we turned south toward the city, pedaling slowly and taking in the sights of the city.

unnamed-3

unnamed-4

Maybe it was the quiet at home, or just a mother’s intuition that alerted Mom to the fact that two kids has just flown the coop. I was beginning to wonder if I could find my way home, when she found us a few blocks down the boulevard. I can’t remember if she was more angry or relieved, but the result was the same when Dad came home. Below is the little house in the city that we called home while Dad was in orthodontic training at IU Dental School.

unnamed-5

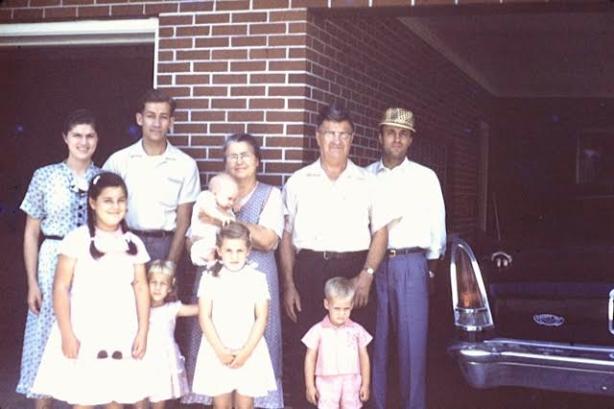
A few years later, we were visiting Uncle Wayne and Aunt Loveda Liechty’s house a couple of miles east of Archbold, Ohio. They had a tractor to pull a wagon, which was the main attraction. In the wagon are my four sisters, Anne, Margaret, Jane and Mary.

unnamed-6

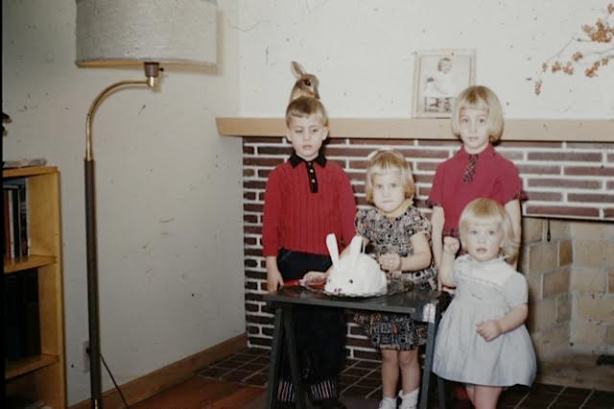
But we were offered some pop, which was a rare opportunity growing up in my Dad’s dental home, where we did not get daily snacks or sweets. Birthdays were an exception, and the photo below shows Mom’s special bunny cake for Margaret’s birthday, at about the age of our journey.

unnamed-7

The fact that we had to walk 2 1/2 miles to the A&W Root Beer Stand, in Archbold, did not deter us. Aunt Loveda gave my sister a dime since she was in school and old enough to drink root beer. I got a nickel because I wasn’t in school and only drank orange pop. Then she gave us detailed instructions to go straight west, until the road came to a T and then turn left.

This seemed simple enough, until the the minutes dragged on and still only cornfields could be seen. The day was so hot that the asphalt on the gravel road had those sticky bubbles, and if you looked ahead you could see the hot shimmering mirage. We had to walk on the grass.

After what seemed like hours, we came to a cross road, and debated if this was the big turn. This was a moment of wondering if we were ever going to get there. Since there were no buildings, we kept going straight.

Finally, we dragged ourselves into Archbold, turned left at the T, and in a couple of blocks, and arrived at the A&W Root Beer Stand. Here we found our reward which was doubly good in proportion to the effort required to achieve it. Apparently, those were days when two bedraggled kids in town by themselves did not stand out, as no one asked who our parents were. Also, no one seemed to be concerned about our safety in the midwest farm community, as we took our afternoon journey.

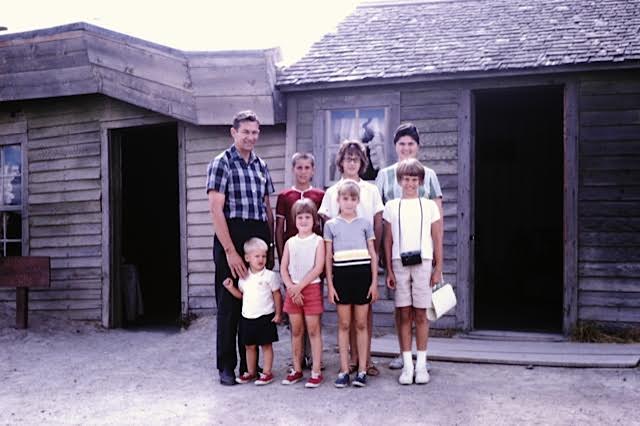
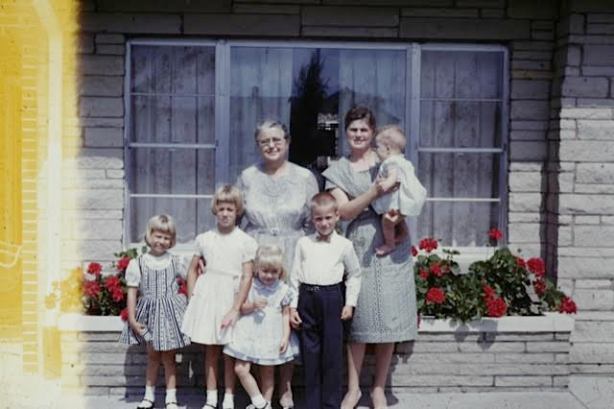
Below is the crew of Mom, Anne, Margaret, Jane, and Mary, with Grandma Emma Liechty on Brussels Street in Archbold.

unnamed-8

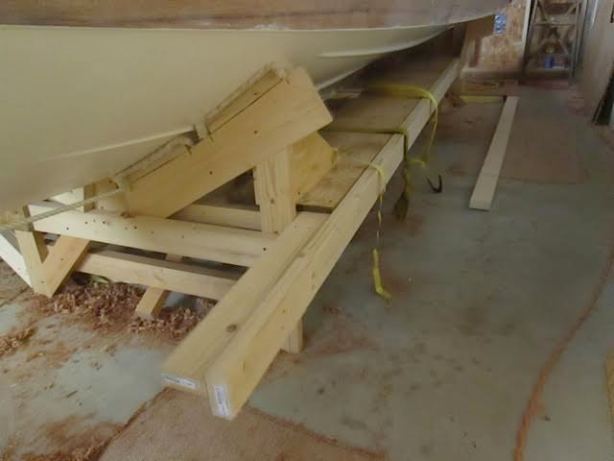
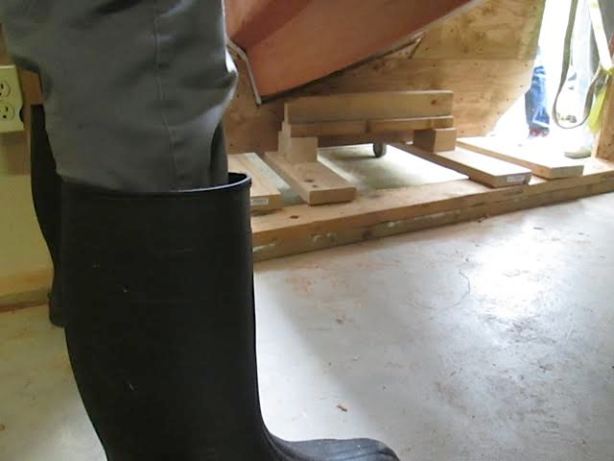
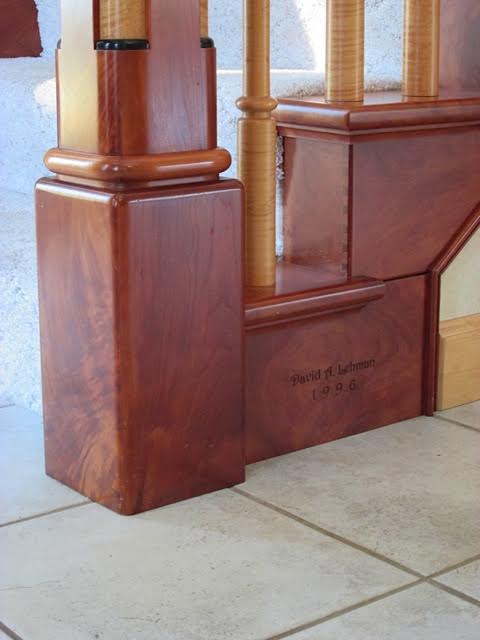
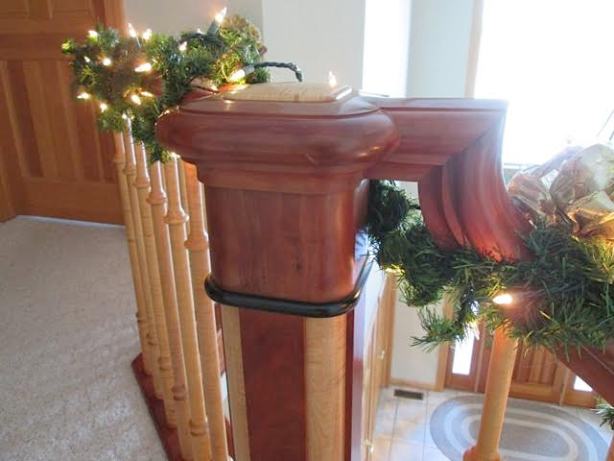
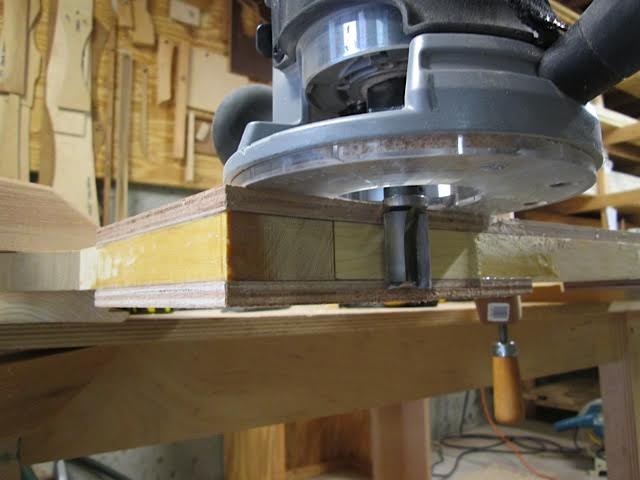
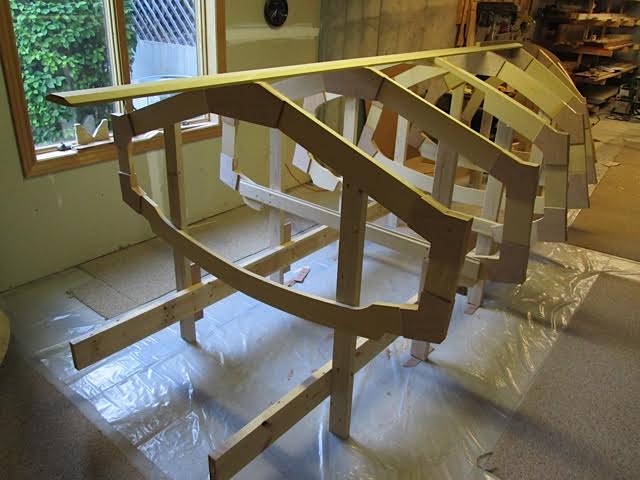
The boat is kind of like that, with wondering if we are on the right track, and sometimes the simplest task seems to have no end. Occasionally, it spanks you with dead ends and disappointments. Below is a jig I spent some hours on, to custom cut cove moulding parts, only to find the parts did not fit the proportion and angles of the corners. By the way, the blade must start very low and be moved up in repeated small increments to get a cut this big.

unnamed-9

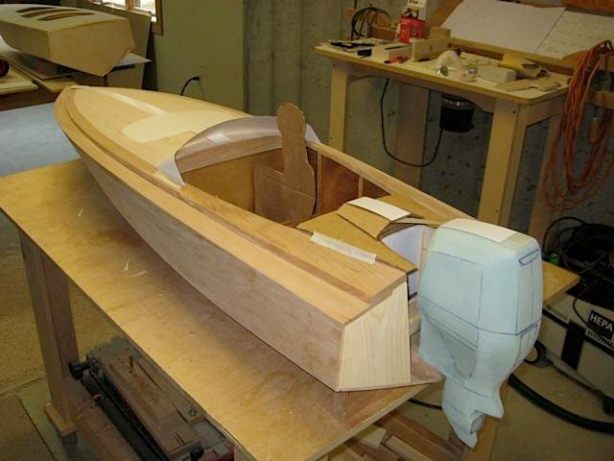
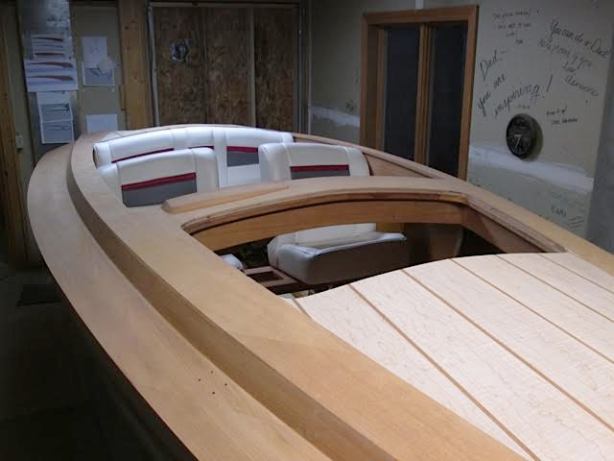
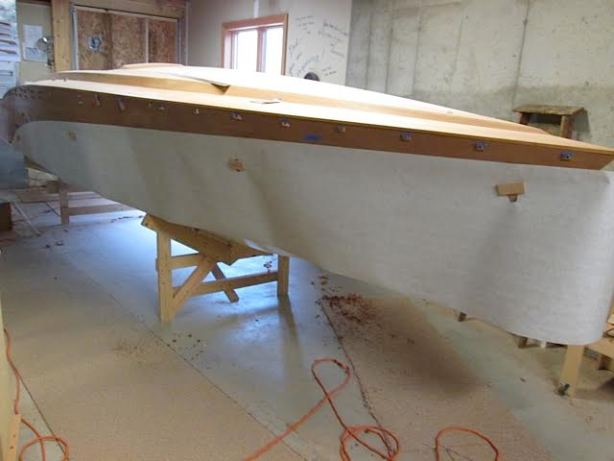
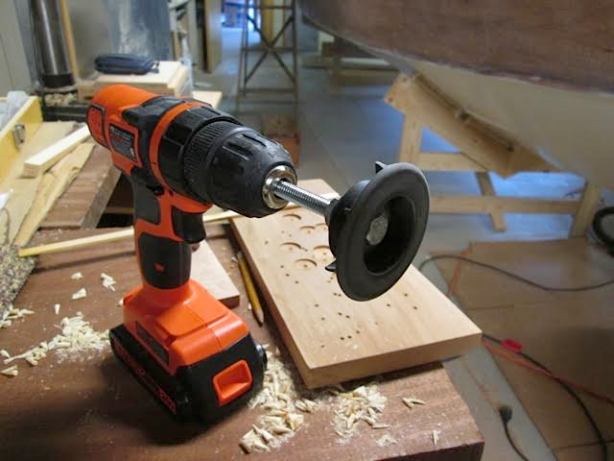
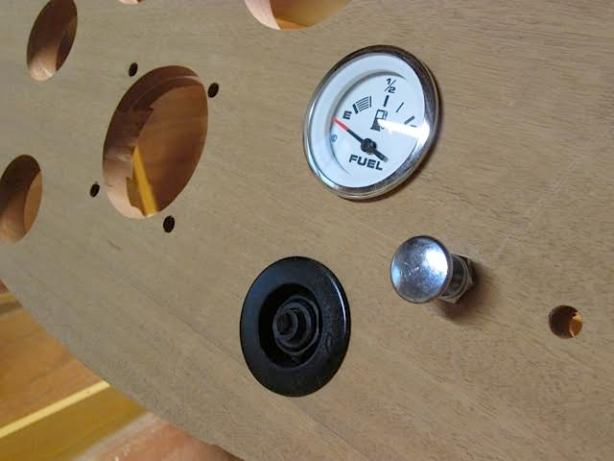
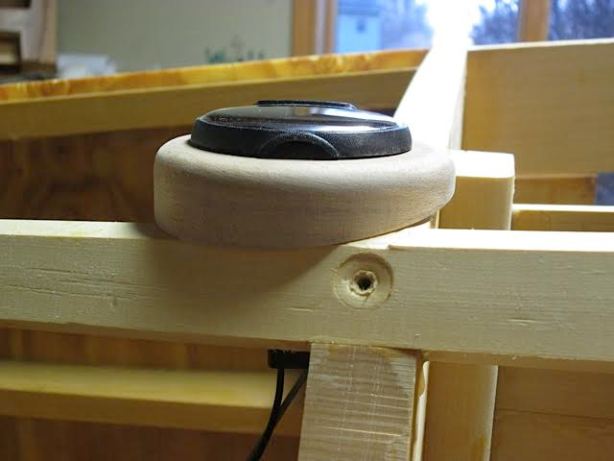
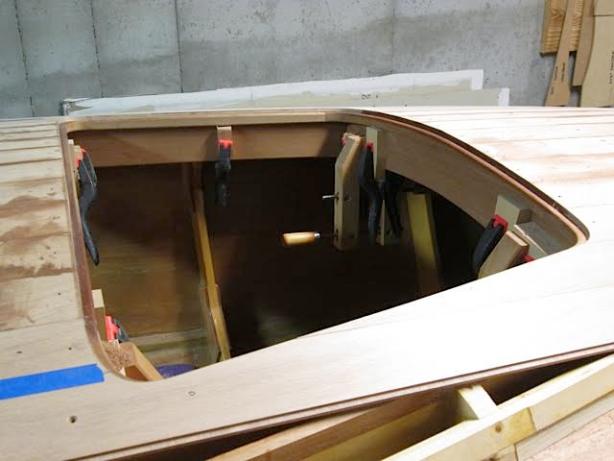
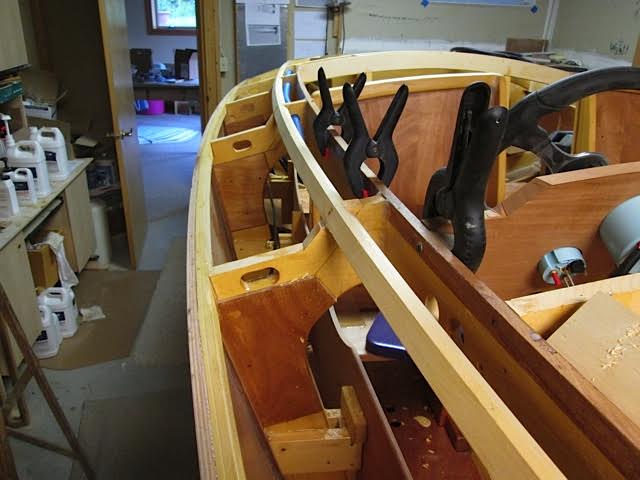
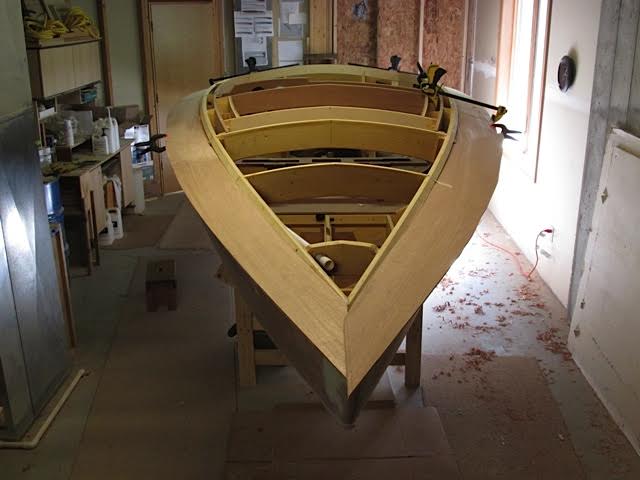
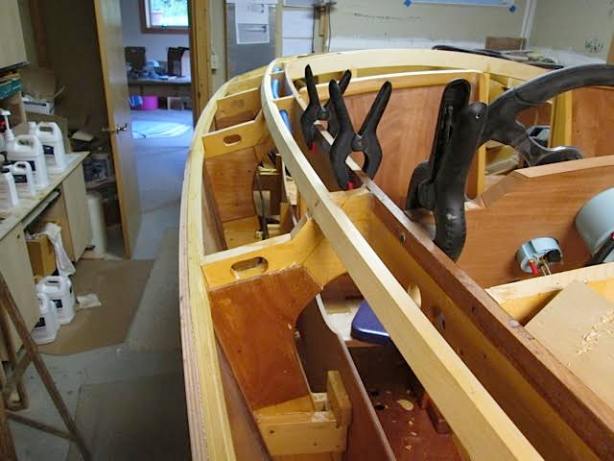
After a few detours and slow motion days, I finally concluded that the inside of the boat is finished enough to move forward. The picture below shows gauges installed in the dash, slots made for the steering hydraulic lines, wood supports for the shelves that conceal the wire harness under them, and a blue conduit for the wires of the navigation lights.

unnamed-10

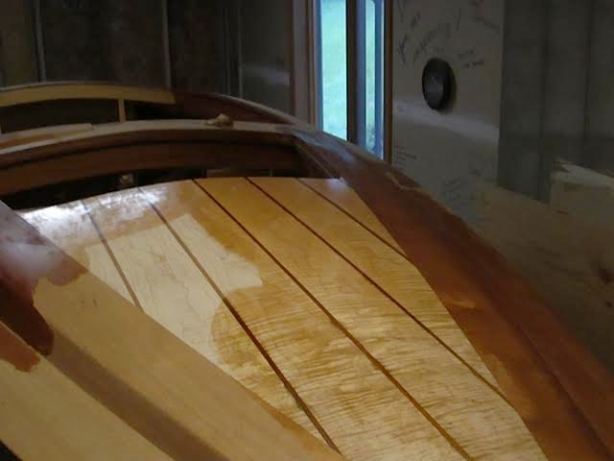
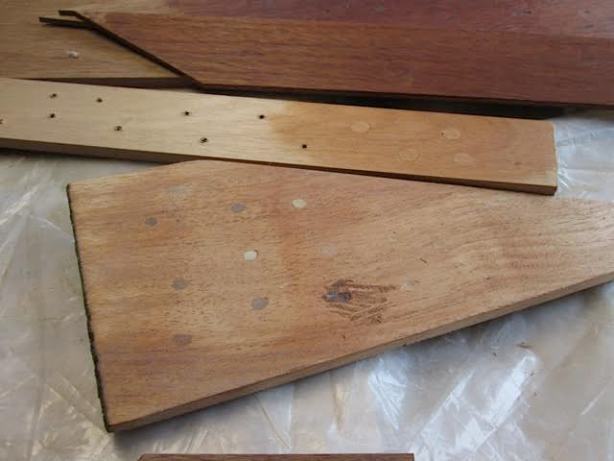
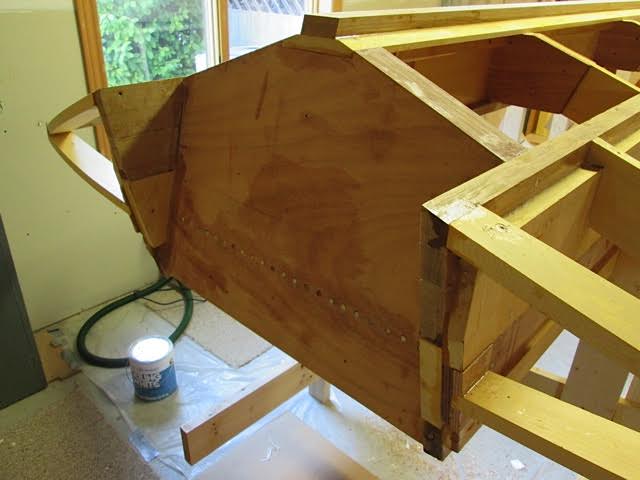
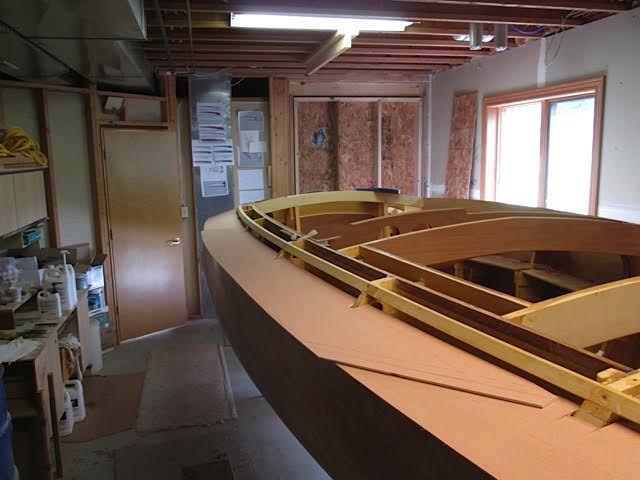
So, the current step is to make the outer deck planks and begin to close in the top. I had two 14-foot pieces of mahogany, 14-20″ wide, that came from a “garage sale” at Swartzendruber Hardwoods a few years back. It looked to be just enough to make the two side planks, in three pieces each. However, a screw-up on even one piece would make it seriously difficult to find another matching part, so I started by making patterns.

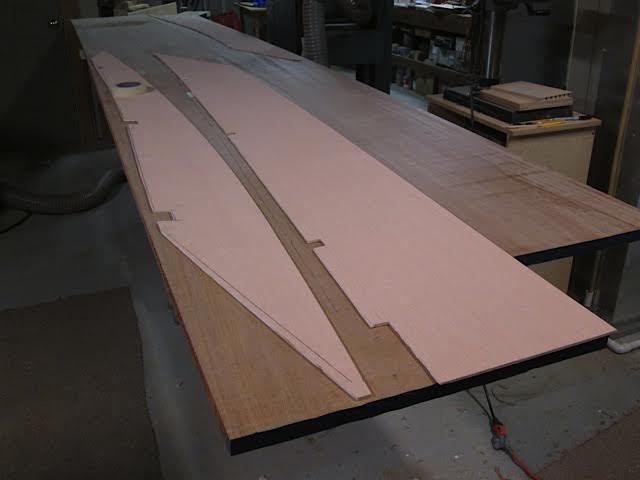
The first attempt was of construction foam, which was not nearly precise enough. Next, I bought a cheap piece of 1/4″ plywood and spent some time doing three detailed patterns for each side, so I could accurately lay them out on the mahogany boards.

unnamed-11

Then, the patterns were oriented on the boards as well as possible to have the curve of the grain tracking with the boat profile.

unnamed-12

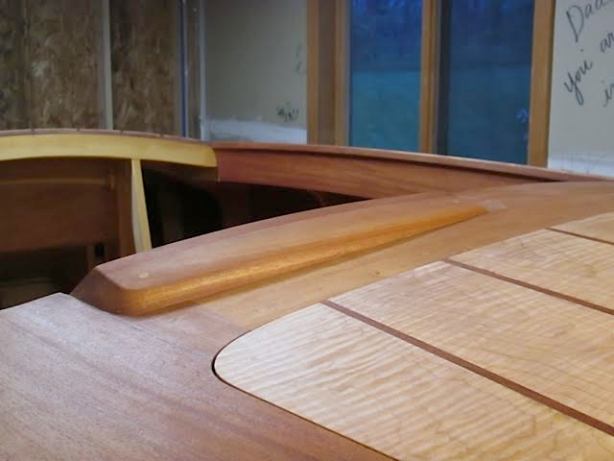
One by one, I began cutting them out and fitting them to the curved boat sheer line, and notching them to fit into the cross frames.

unnamed-13

When they were all fit, and angled to meet the next plank, I joined the parts together. At the back scarf joint, I used biscuits to help with alignment.

unnamed-14

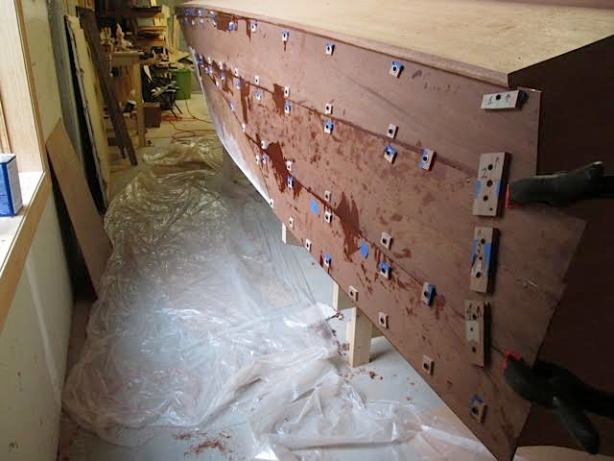
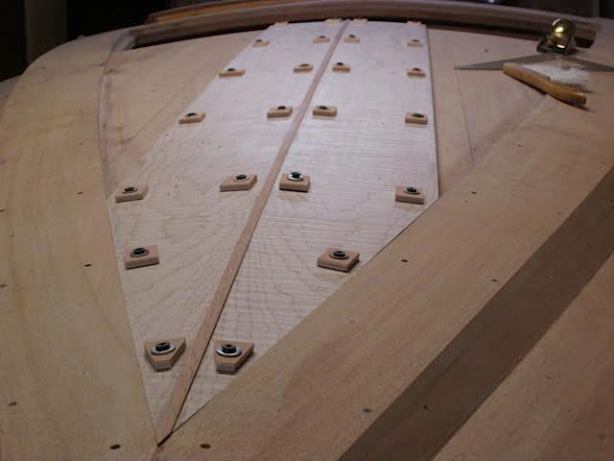
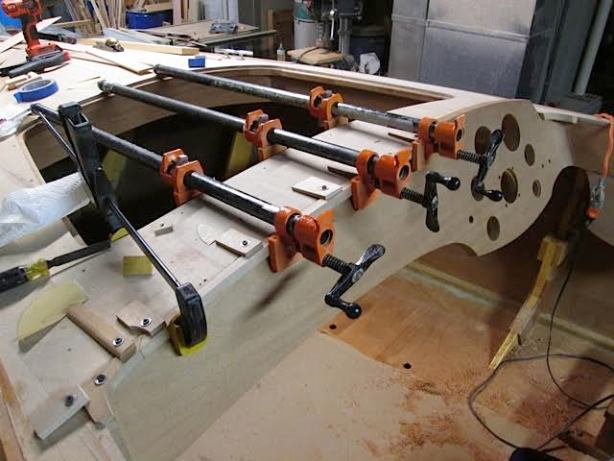
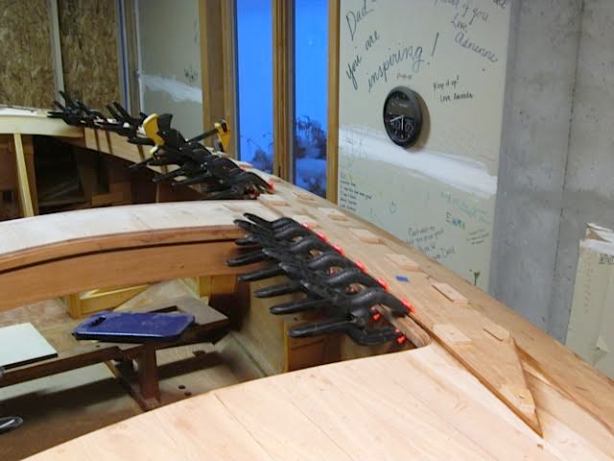
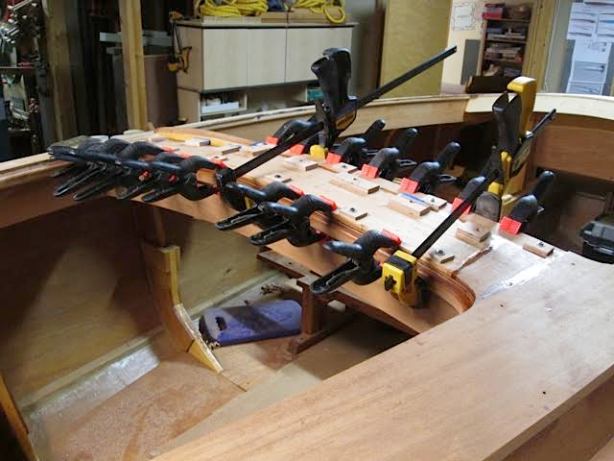
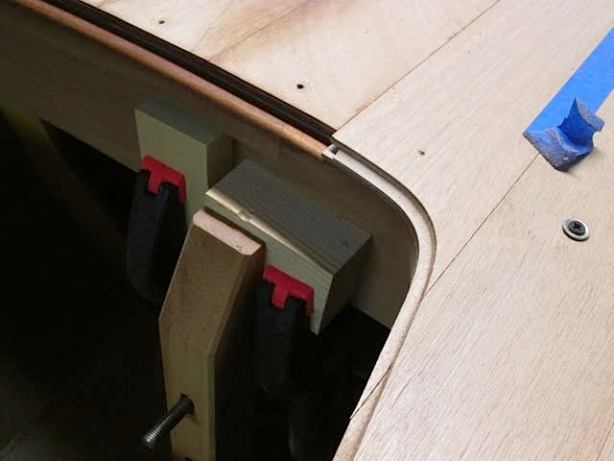
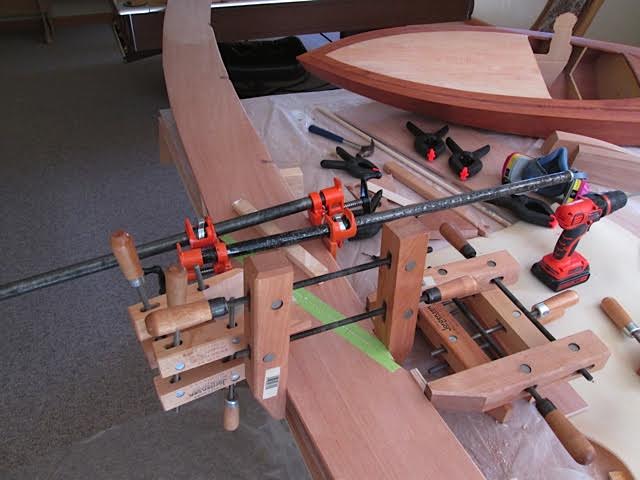
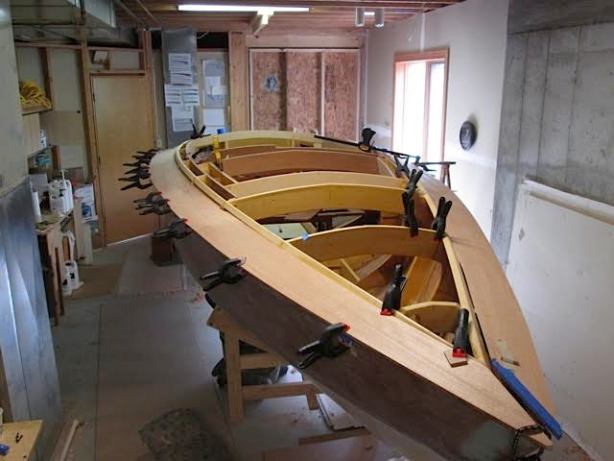
Next was the critical glue-up step. When clamping diagonal parts, the pieces tend to slide sideways, so I used the wood screw clamp laid horizontally to resist side movement. It anchors on two small temporary blocks, fastened to the inside edge, where the screw holes wouldn’t show later. The green masking tape is to prevent glue ooze-out where it would be difficult to sand.

unnamed-15

The one-fifth scale model hangs around on the table for inspiration. Grandson Clayton thinks it should become a radio controlled model for future use. Here the second side is being fit to the curve and notched.

unnamed-16

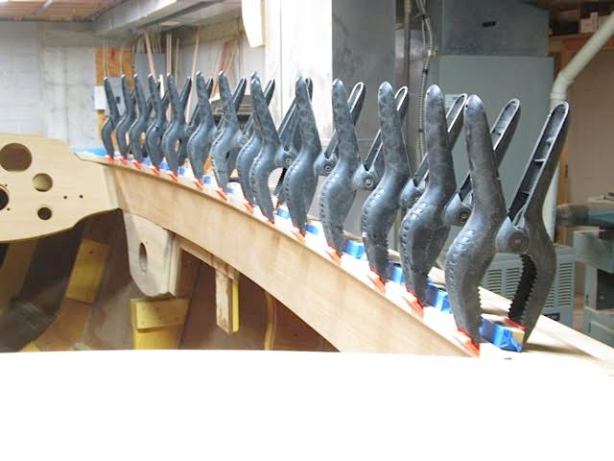
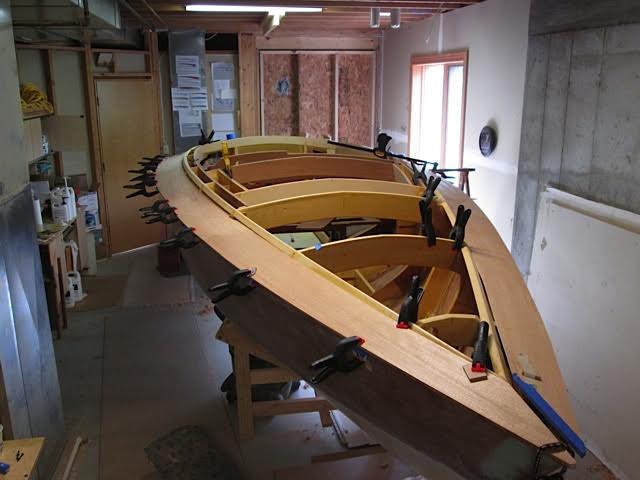
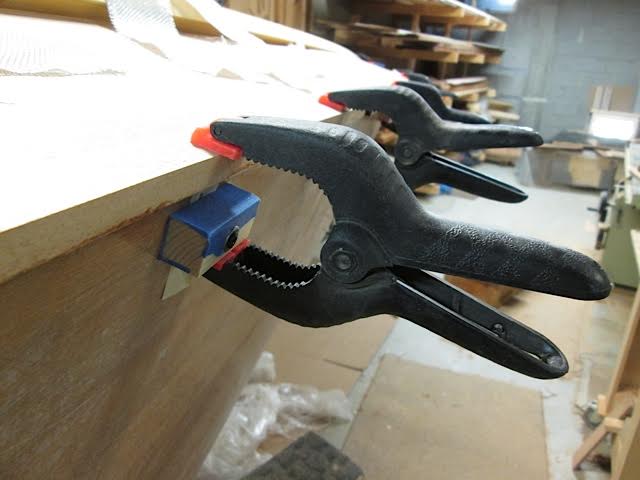
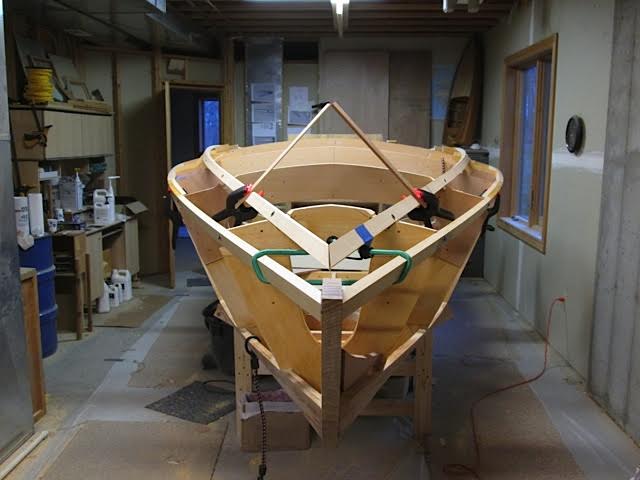
Below is the photo of the first side being epoxied in place. Since it was a curved piece with the outside angled down, clamping mainly on the outside created enough glue pressure on the inner side as well. The clamp blocks were screwed in temporarily, and the holes will be filled and covered by a mahogany veneer that goes on the outside. This way, almost no screw holes will be seen, except at the back where more torquing was done.

unnamed-17

unnamed-18

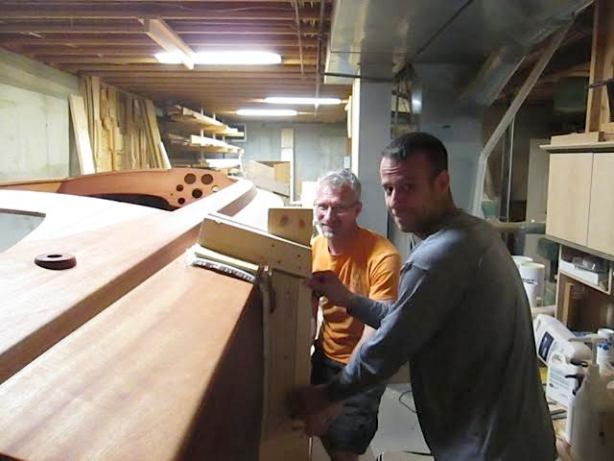
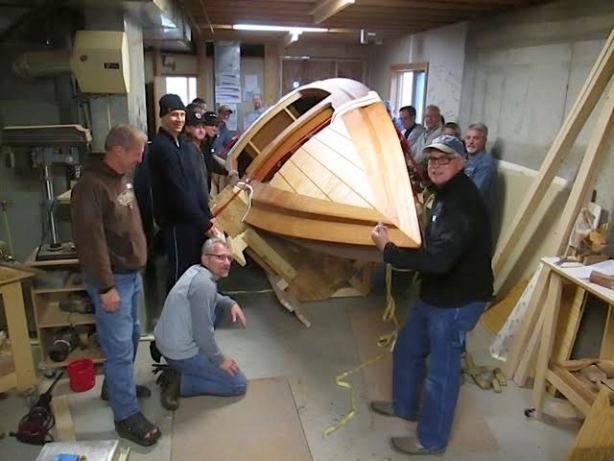
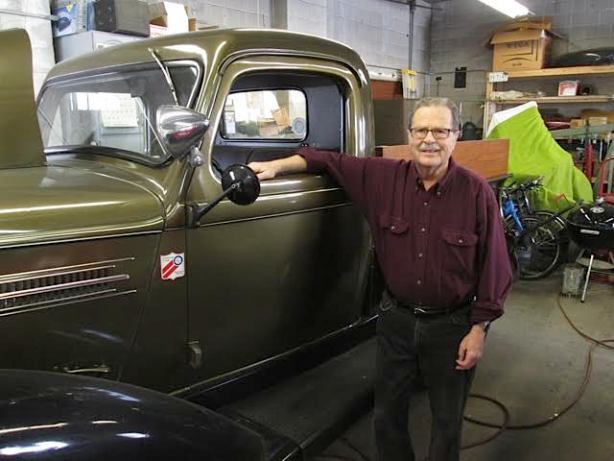
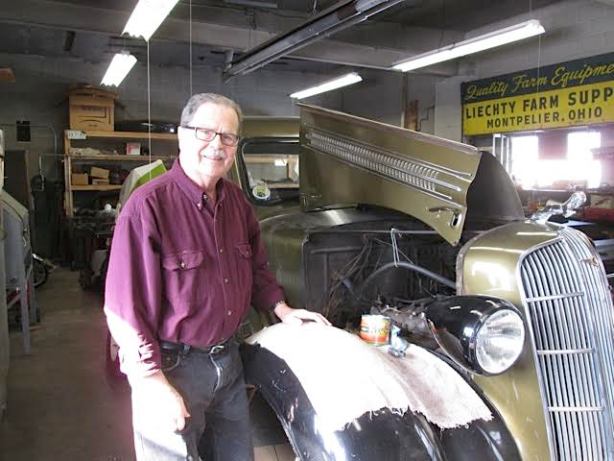
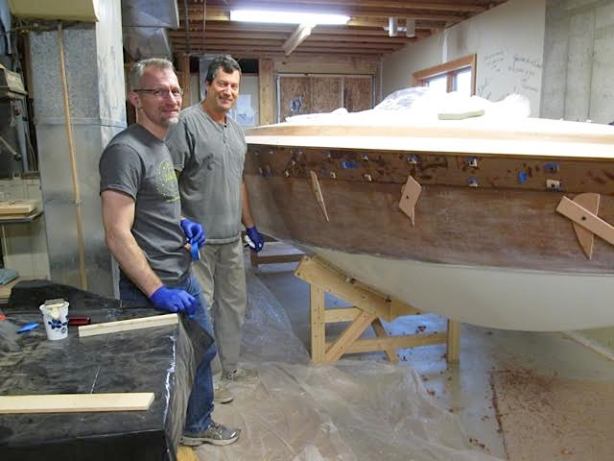
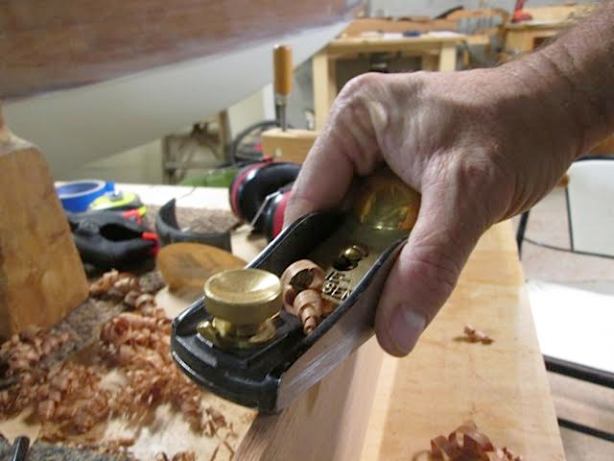
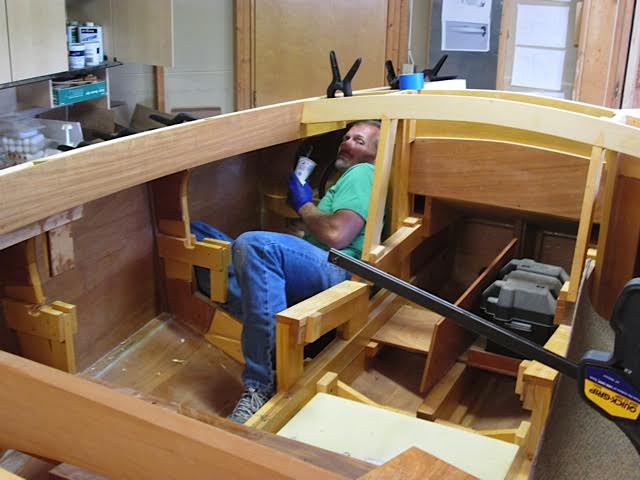
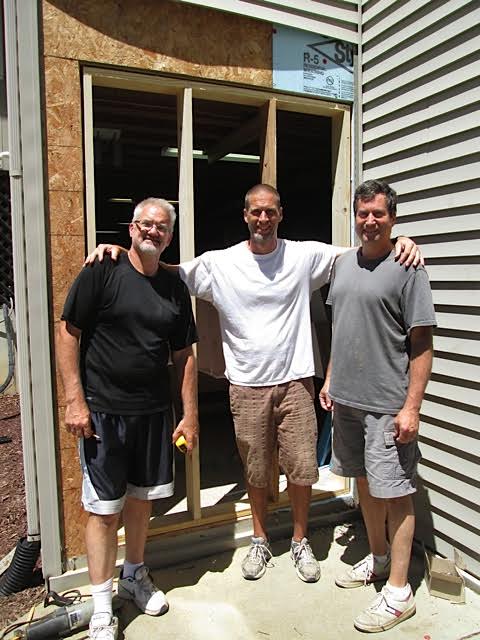
Here is Jeff Margush, making up for my height and heft, with his trim and limber physique, finishing the inside epoxy fillets. Now, that is the measure of a friend.

unnamed-19

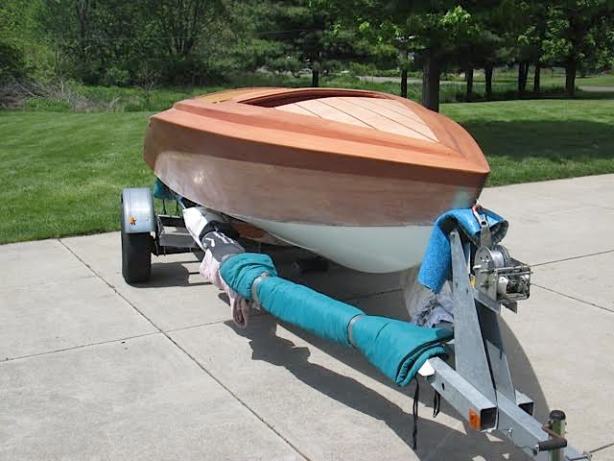
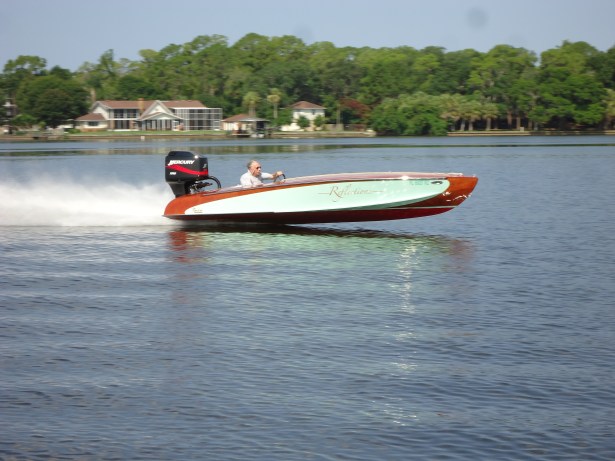
Am I done with the boat yet? No, but the light at the end of the tunnel no longer looks like an oncoming train.

“Twenty years from now you will be more disappointed by the things you didn’t do than by the ones you did do. So throw off the bow lines. Sail away from the safe harbor. Catch the trade winds in your sails. Explore. Dream. Discover.”

-Mark Twain

The Hole in the Wall

Even though my brother Joe is nine years younger, we have been doing adventures since the beginning. In the 60’s at our house, there was no TV, and the radio’s dial was off-limits for a teenager. The inside of our house had no magnetic pull to us, and besides, with four sisters, the boys had to stick together.

unnamed

Early on, we went hiking along Yellow Creek from the Concord Junior High, ranging a mile or so from home, trying to walk across on the fallen logs. We also played catch with a baseball or football in the yard, and shot hoops on the sloping driveway.

unnamed-1

unnamed-2

Sometimes we went plinking with our slingshots which I made from forked sticks and some rubber surgical tubing that my Uncle Ernest Smucker, a surgeon, gave me. We spent hours with friends on the rope swing over the creek, where the exhilaration often led to a wet ending.

In the winter, we ice skated on the creek, or better yet, played hockey at the junior high tennis courts, when the Dunlap Fire Department came to flood it. We iced sledding ramps on the hill beside our house, and Joe had his neighbor buddies over to play.

unnamed-3

When I went off to Goshen College, Joe occasionally came to stay with me in my dorm. One summer, at Shavehead Lake, we decided to try barefoot skiing and eventually taught ourselves how to get going off of a knee board. Below is Joe and sister Mary going slalom.

unnamed-4

After Joe finished college, we did stuff like biking Parke county with a bunch of the old wood covered bridges and a night ride through Denver. But on one special winter day in Colorado, we went skiing. Below is a photo of where we got started skiing as a family, with Mom and Joe at Swiss Valley.

unnamed-5

In his 20’s, he was just coming into his prime and I was rapidly leaving mine behind, but there was enough overlap for us to head for the moguls. There was one beautiful stretch of steep snow that we went down single file a few times to get the feel of it. Then, someone had the idea to go side by side, so we took off together. We were skiing hard and staying fluid in the right/left, up/down rhythm of the mogul paths. We were in the “zone,” making a memory of a lifetime, when we heard some clapping from the chair lift beside the run. That was apparently enough to break my concentration, and I took the inevitable thing that “pride goeth before.” It is sometimes also referred to in the trade as a “yard sale.”

As Joe got older, we still did some casual adventure, but I began mostly watching his performances.

unnamed-6

unnamed-7

You have to know when to step aside.

unnamed

As Joe got into more serious life-threatening adventures like biking and hiking in Mexico, he went with his own crazy peers like Lynford Beachy and Jeff Hershberger. Then there was the summer that Joe even built a house to sell in Miller’s River Manor behind Oxbow School. Of course, he dragged me into the project to help with the wood floor.

unnamed-1

So it was only natural that when I needed a hole in my basement for the boat to escape, it was Joe to the rescue. Realistically, the boat won’t need the exit hole until next spring, but he was coming to Elkhart over the summer, and he volunteered his enthusiasm in the boat project. Did I mention we will have to take it out sideways like a grand piano?

unnamed-2

The real genius was inviting Todd Smucker, a friend from their softball days at Belmont Mennonite Church. Todd had the most experience with vinyl siding, with all of the tools and tricks to get the wall cut quickly and a temporary door in place.

unnamed

unnamed-1

Fight with your brother, if you must when you are young, but stick by him when you are older, because you never know when you might need help getting out of a hole.

Little Boat Things

Recently, a new friend Troy Madlem said (my paraphrase) that he appreciated the boat process but that you had to wade through a bunch of fluff in my blog posts to get there. So here are a few little things about the boat without so much of the stories:

It all started with these balsa wood models that I made around age 13-16. At the time they were working boats, one had an air motor, and the others had sails.

unnamed

The dream became more compelling in 1972 when I was in high school and my dad bought this 16′ Marlin Scorpion with green metal flake paint. It had an 85 HP Johnson motor which pushed the boat close to 45 mph and your heart rate over a hundred. This was never known for sure, as it had no tachometer, speedometer, fuel gauge, or any other gauge, but it was capable of pulling a barefoot skier.

unnamed

My brother Joe and I took a few runs on Shavehead Lake in the early 80’s. We sat back on a knee board and stood up as the speed increased. I did enough to say I “footed”, but Joe got pretty good. A hard fall convinced me eventually to stick with skiing on the “Green Flash”, our O’brien slalom ski with a concave bottom that could really cut.

And so these little things led to the day I decided to make the dream a reality and build a boat of my own.

Below is the first stage of the process, a 1/5 scale model made of 3/8″ plywood, cherry and maple. The motor is thanks to Jeff Margush’s sculpting.

unnamed

Then, the model took a proportional weight test in the hot tub. At 1/5 scale, 1 pound is equal to 125 pounds in real size. So the 2 lb. exercise weight in the driver’s seat represents an adult man with the seat. The miscellaneous mix at the back adds up to the 420 lb. Evinrude 135 hp motor.

unnamed

Next, is a photo of the assembly of the cross frames. It shows the dowel assembly and the custom clamping that was often required for irregularly shaped parts. This may be overkill engineering, as the joints were then reinforced with plywood gussets.

unnamed

Here is a photo of shaping curved parts with a self-guiding router bit. Notice the bearing at the top of the cutter. I would carve or rasp that top edge to a fair curve and then rout the rest to join it. This was a cut and repeat method until it looked right.

unnamed

The strong back is the assembly that the cross frames are attached to. It is one of many operations in boat work that is eventually is removed from the boat, but is essential to get right if the boat is going to have fair lines.

unnamed

Then, the longitudinal stringers and structural parts were added. This is where a multitude of spring clamps shine, being easy to place in tight spaces.

unnamed

Eventually, the top stringers were added, being let in to the cross frames, sawn with a wonderful Japanese pull-stroke saw.

unnamed

To help match the stringers as they came forward, I clamped on the short sticks and torqued the pieces until the angles were the same.

unnamed

Here is Jeff Margush and his son Jason, installing the fiberglass fabric to be embedded in epoxy. This created much more stiffness and puncture resistance for the marine plywood core.

unnamed

By themselves, each of the steps above is a little thing, but when they are done well, and in combination with many other parts, become a thing of beauty. Here is our friend and favorite musician Jon Guerra, with his wife Val, my daughter Amanda and their friend Sarah.

unnamed

The title track of his recent album, Little Songs, is about offering the best of what we have as first fruits back to God, the words, the tunes, our hearts. It is an inspiring way to live.

Some unattributed author wrote, “The way you do anything is the way you do everything.”

The Third Boat Turn

By definition, a turn follows a period of straight movement or consistent activity with a change in direction.  It is often connected with a landmark to describe it, or some memorable drama.  You can turn over a new leaf, see the hands of time turn slowly, or watch a marshmallow turn golden over the camp fire, as sunset turns the day to dusk.  Hopefully, you will experience the one good turn that deserves another, and never have nowhere to turn.

You could also make a wrong turn.  In the case of the road below (near Portage Point), in my opinion, it would only be the wrong way to go if you were seriously out of time to explore.

unnamed

It is exciting to see the winter turn to spring in northern Indiana, marked by the sap buckets hanging on the maple trees.  It takes around 40 gallons of sap to make one gallon of maple syrup.

unnamed-1

Not far behind is the blooming of the daffodils, left over in the woods behind our house from someone’s planting long ago.

unnamed-3

One of my favorite turning events happened at Little Eden Camp in my teen years.  One of the week’s highlights was the canoe trip on the Little Pine River near Manistee.  We would load the canoes on the cars, and head for the river.

unnamed-2

The first stretch we were usually a bit cautious as we reacquainted ourselves with how to guide the boat down between rocks, logs and sand bars.  Before long, however, some paddle splashing would inevitably begin, and a few boats would get turned over.  Below, Dad is steering with Anne and I in the front.

unnamed-4

Sometimes, turns come without asking, in unexpected ways.  In the summer of 1981, I had applied for and was accepted to the Hans Krieks Masterclass so we headed off to New York City.  We loaded up a small U-Haul behind the trusty Dodge Dart featured below, which did not have a working fuel gauge.  This caused us to misjudge how much extra gas it took to pull a trailer and we ran out of gas around midnight in Pennsylvania.

unnamed-5

Fortunately, in the days before cell phones, other travelers would stop to help someone in need.  We passed a message along with a man, who called Royce and Marci Yoder at the nearest pay phone.  In a couple of hours, Royce appeared with some gas and guided us to their house for the rest of the night.  Here they are when they visited us later in Manhattan.

unnamed-6

The class was more of an apprenticeship than a typical college program.  A group of five of us came together in September from all over the country to study furniture design with Mr. Krieks.  We spent one day a week in a studio class, and the rest of the week working on our assignments.  Below are a few of the projects I had started working on.  The first is a study for a tall chair, which later became a high chair for my daughter Adrienne, and the second is for a plexiglass and foam chair that never got built.

unnamed-7 unnamed-8

It was my sweet spot, and I was thriving on the New York City design environment. Design was everywhere, in the architecture, the furniture, museums, store windows, and people.  One highlight was being invited to a private meeting with Niels Diffrient, an industrial designer who revolutionized ergonomic seating for office, airline and John Deere tractor seating.

I loved walking around downtown, hearing street performers, seeing great architecture and museums.

unnamed-10

One day in the middle of October, Mr. Krieks did not make it to class and instead a past graduate stood in.  We went through the motions of class and homework and carried on.  The next week he was sick again, and then we found out he was in the hospital.  He never returned.  Around Thanksgiving, Hans Krieks passed away, and the class was ended.

I continued working as a waiter at a Victoria Station in the Bronx, and Jan as a waitress at Ehring’s German Restaurant.   For the next couple of months we wandered New York City and traveled north as far as Rhode Island to explore a bit of the east coast.  By January, we loaded up the U-Haul and headed back to Indiana as it was time to turn the page.

This was a difficult and dramatic turn of events, which led to my eventual going to dental school, and following my father in Orthodontics.  However, I never lost the passion for design and with this boat it turns up again.  At the same time, I experienced another evidence of God’s redemption: His ability to add all of the past together and make something good.

Turning the boat right side up was a great milestone, because the difficult bottom painting was done, and because I have no plans to turn it bottom up again.  I first had to refit the cradle now that the bottom strakes were in place.

unnamed-11

Then my favorite assistant helped me get the carpet cushions and rope in place.  Each of the 3/4″ nylon rope loops is supposed to hold 750 pounds, which was fine as I estimate the boat weighs around 800 pounds at this point.

unnamed-12

The only problem occurred when the side of the boat touched the floor as we hoisted and rotated it vertically.  Below, Jeff Margush is supporting the bottom as we shorten the loops.

unnamed-13

Here is the crew of good neighbors who helped out, from left to right: Brad Kime, Don Florea, Payton Fish, Greg Tipton, myself, Jeff Margush, Brad Fish, John Kime and Mike Perron.  I bet they could successfully navigate the “Minnow” on a “three hour tour.”

unnamed-14

The biggest turn of events a person can have is the day they realize they are unworthy before a God of love and justice, and decide to seek His forgiveness and salvation.  As for me, like the old song goes, “I have decided to follow Jesus, no turning back, no turning back.”