
Fairing a surface is the process of making the curves regular, that is, without noticeable hills or valleys. Problems are not easy to spot visually at this stage, but will become very visible later when a glossy paint or varnish is applied.
It would have been easier, if I had designed it with contemporary flat plane surfaces, but no, it had to have inner and outer curves. The secret according to Jeff Margush, is to make special sanding boards that roughly fit the curves of the boat hull. Below are the five most useful of the ones I made, starting from the top:
- Half inch plywood with 80 grit belt sander paper, held by contact cement.
- An adjustable convex sander, 40 grit, 1/4 inch plywood for easier bending.
- A concave surface sander, 40 grit and 1/4 inch plywood.
- Three handled bendable straight sander, 40 grit, 1/4 inch plywood.
- Three handled bendable sander, 80 grit on 1/4 inch plywood.
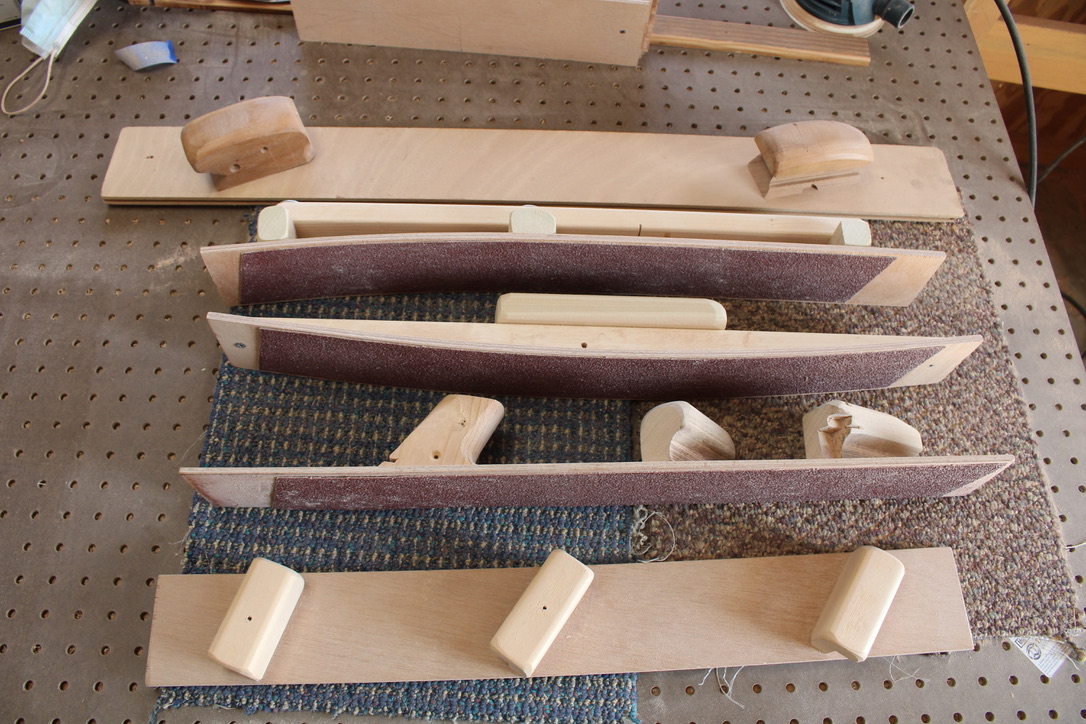
Below is the convex sander, which has the removable wedge at the top, to allow more precise adjustment to the slight barrel back contour.

This sander below is used to smooth the hollows, the concavities, including areas that were far enough inset that I needed to add some epoxy filler. Fortunately, when cured, it is formulated to sand nearly the same as the plywood.

Sometimes, for special concentrated shaping the scraper is the perfect tool. It has a removable carbide insert blade that is really useful.
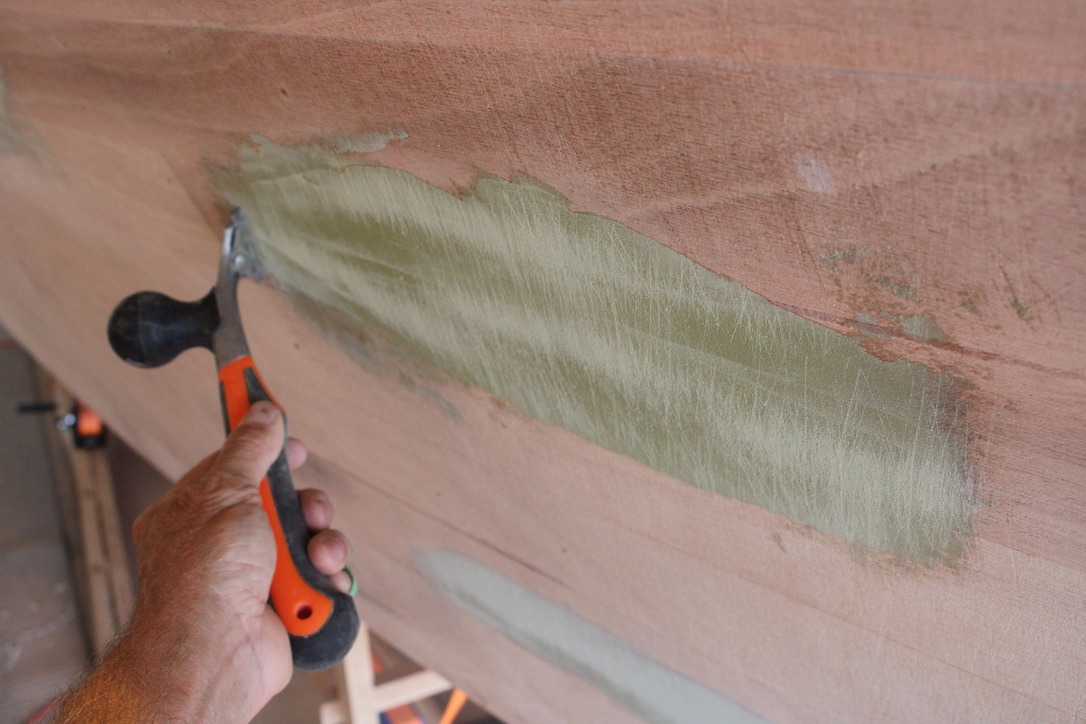
At this point, the boat doesn’t look so great with sanding through the first layer of plywood, and the added green filler. But if you close your eyes, and move your open palmed hand over the hull surface, you can feel if the hills and valleys are still there, or just one regular curve is left.
It is a great sense of accomplishment when you can no longer feel where the side planks join, or where the green surface starts.

After many trips around the boat, hand checking and sanding, I believe the fairing is 95% plus done. But I reserve the right to do an inspection after the glass fabric and epoxy are added to the bottom.
No matter what, it is a great step of progress to be past this stage.

To understand the workmanship described here, one would have to see how 99% of today’s boats are actually constructed. They start where Dave ends – with the surface paint ( colored gelcoat applied inside of a hull or topside mold), then apply the fiberglass fiber and resin in layers and only then add the structural components for strengthening and tying it all together. The only craftsmanship involved is in shaping the “plug” from which the molds are created. Once properly shaped, the resulting mold can be used to mass produced hundreds of boats that replicate that shape.
Today’s fiberglass hulls are built this way because our society doesn’t have the time or appreciation for true workmanship, but more importantly, we lack enough true craftsman, like David Lehman, and the dreams of a perfectly finished craft!