
Next up to light some fire under my feet is none other than the third member of the previously mentioned Car, Boat and General Design Club. At church, between services, near the offering box, where we regularly have our scheduled meetings, Bob Herrold asked me what my time schedule was for the boat to hit water. I said that I was optimistic for a spring of 2025, which gives me two years from today.
That seemed unacceptable to Bob as he had a disappointed expression on his face. He said that it must be a pretty complicated boat! True, but with other life complications. I need to work as hard as Bob does in his volunteer work at the hospital.
Consider it a challenge taken, and I am determined to shift into a higher gear. The cross frames are mounted, and the keel and structural beams are connected to the transom. The chine is now complete, and all surface parts have been faired.

The time has arrived to put the hull planks on the bottom of the boat.

Below is shown how the tongue and groove planks machined on my router tables from 1/2″ Marine Grade Plywood fit together.

The large washers for the screws are needed to hold the front planks to the keel frame. The extra length will be cut away later in the fun stage of final shaping.

The most difficult parts are the border planks which must be shaped to fit to the keel or the chine. When they don’t line up side by side, I sometimes use a guide block as shown below to pull out a depressed area. Getting a great fit to the chine is a challenge also, and when it is close, sawing through the joint is a good way of reducing the high spots.
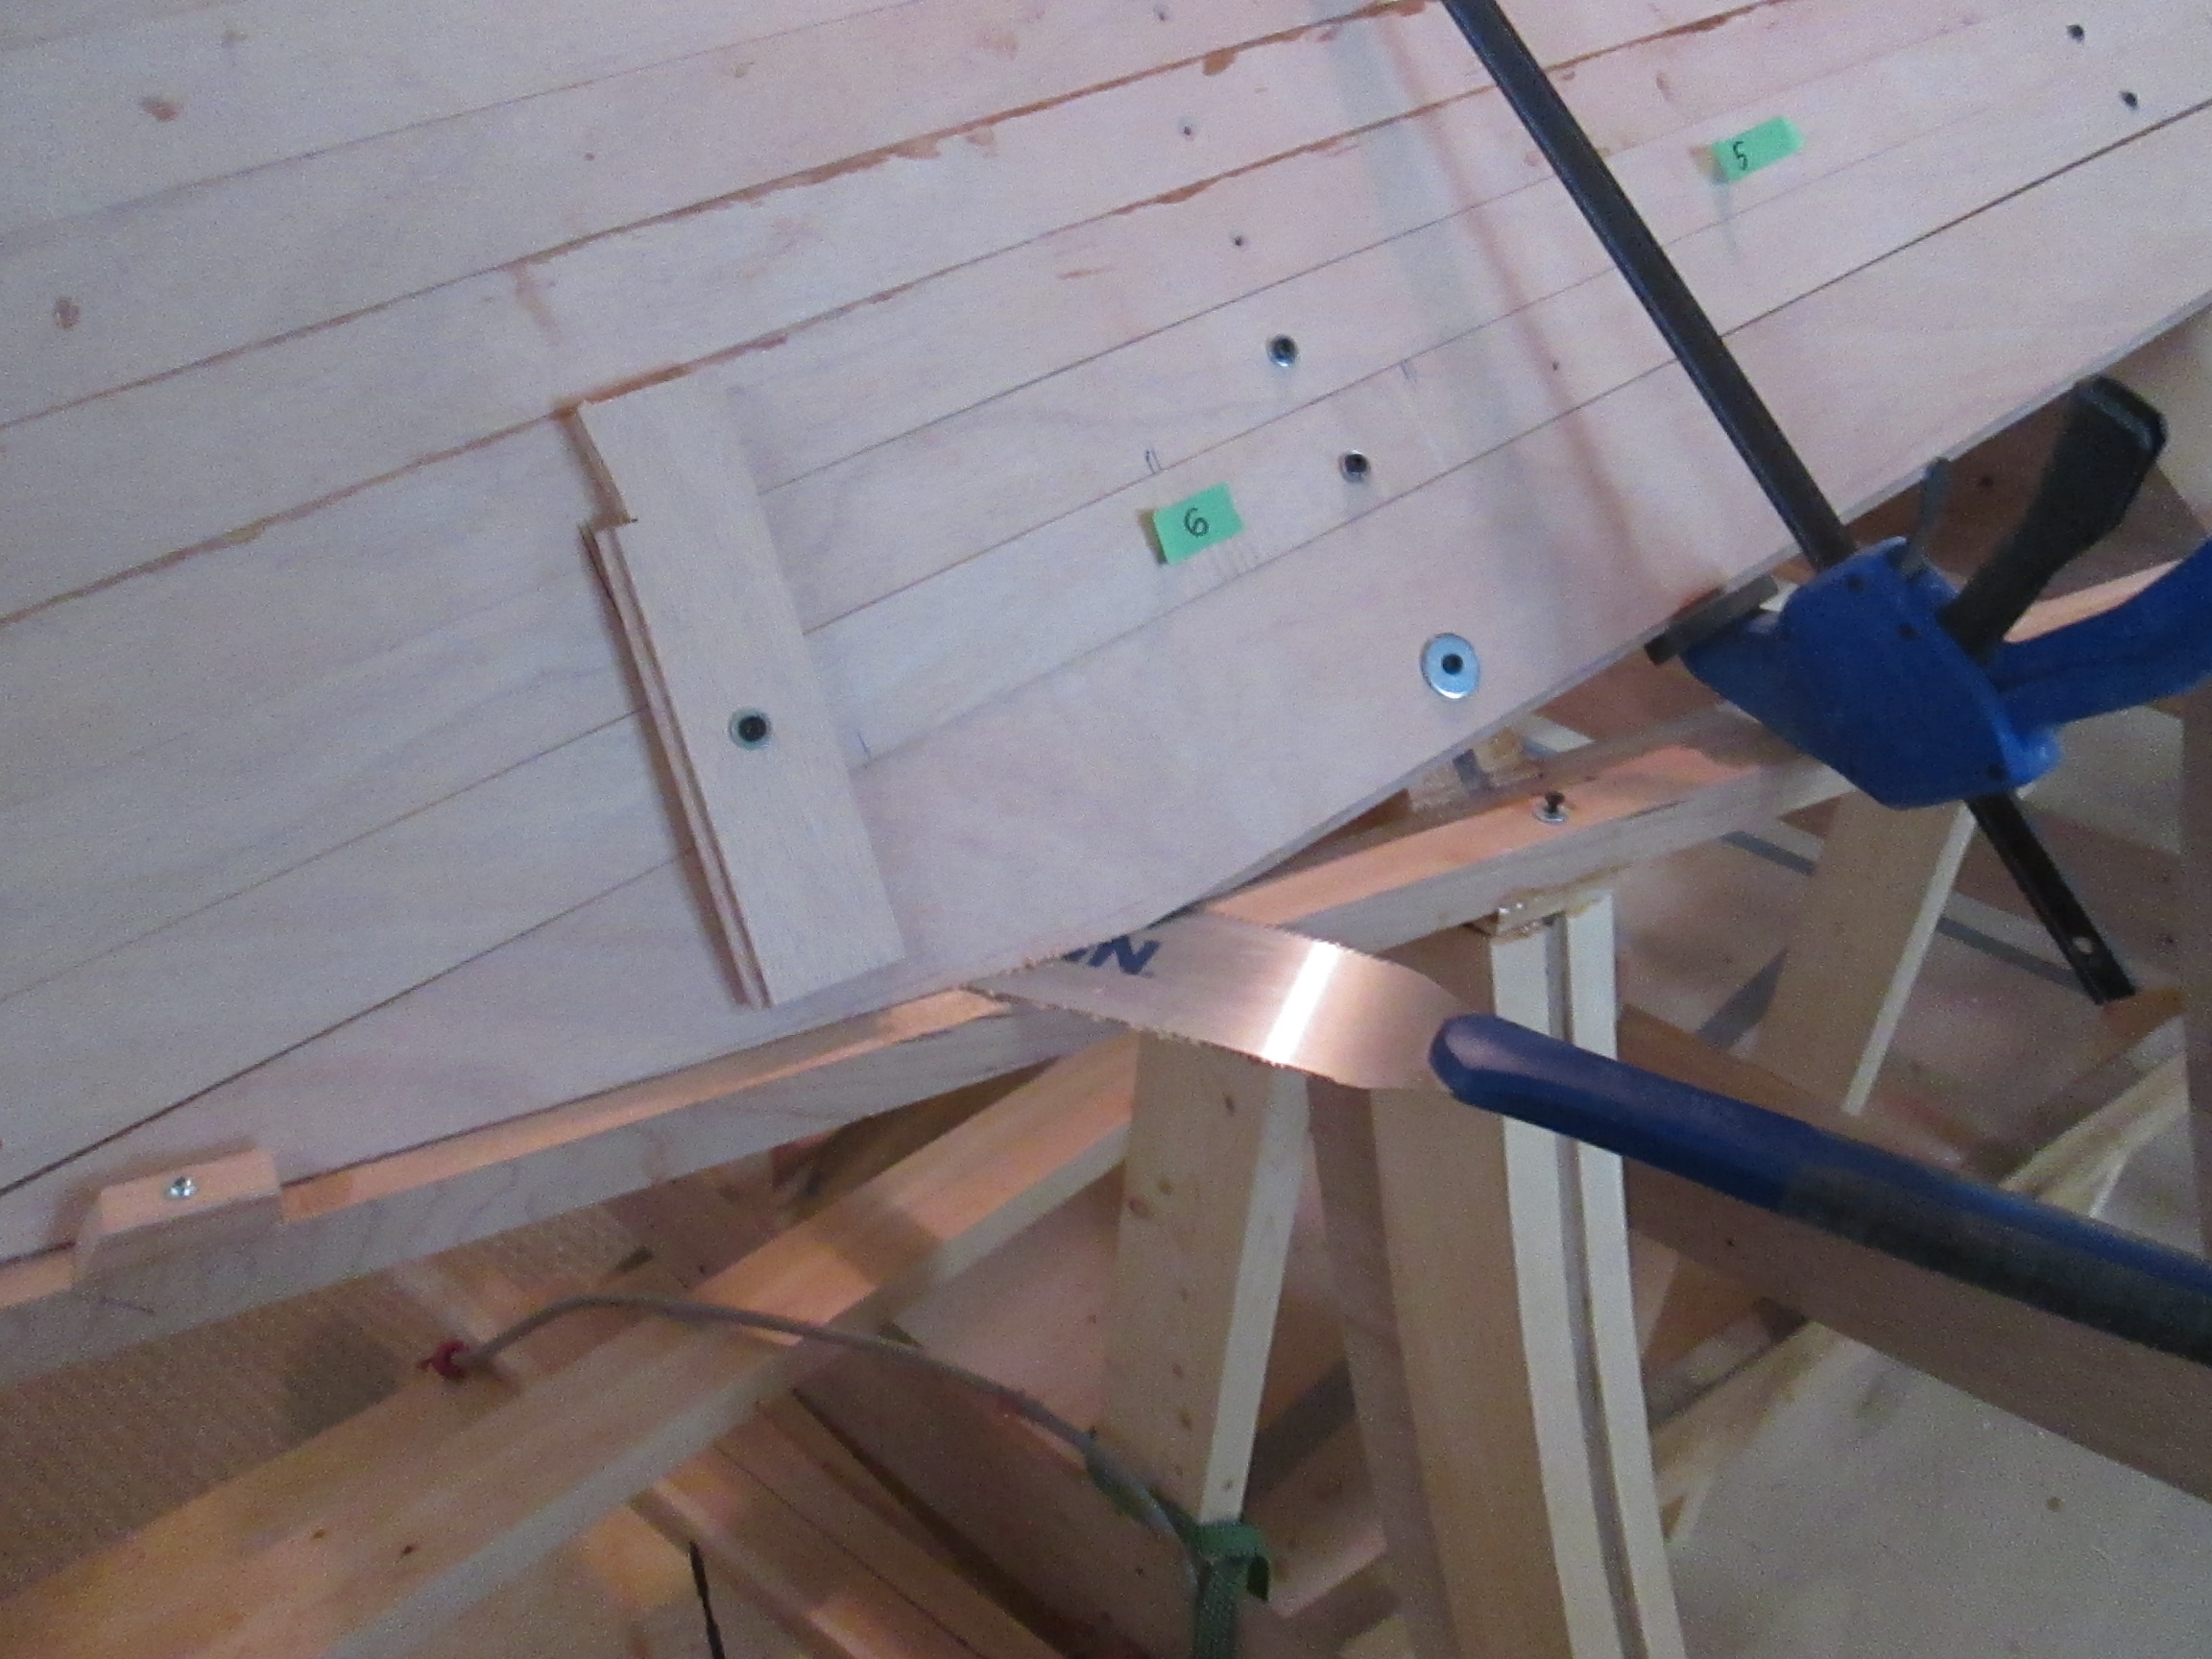
When dry assembly is done, the hull planks are numbered, removed, glued with epoxy, clamped, and screwed to the frame members.
The epoxy takes a few hours to set up, but I generally wait over night to make sure it is hard. Then all of the screws are taken out, because any metal left in a potentially wet environment will corrode and the wood around it will eventually rot.

The surface created is already pretty well shaped, due to the benefit of the tongue and groove method of joining pieces. Sometimes, as shown above, an alignment block helps to flatten a poorly cooperating board.
After this layer is glued on, a thorough sanding will be done to “fair” it smooth without high or low areas, only regular curves. Then, the half inch bottom plywood will be covered by a second layer of 1/4″ plywood, making a strong and stiff 3/4″ bottom surface.
Boat building is a long, demanding process, so dividing it into smaller steps helps to see progress. This step of seeing the structure begin to take shape is a strong, motivating milestone.
Another encouragement comes from other boat builders. We are few and far between, so we don’t tend to have much routine contact. However, in the history of building both my boats so far, curious people from 140 countries of the world have checked in. Thanks to recent readers from Belgium and Ecuador. I hope your boats are coming along spendidly.
